Endgame Precision
Starting Position
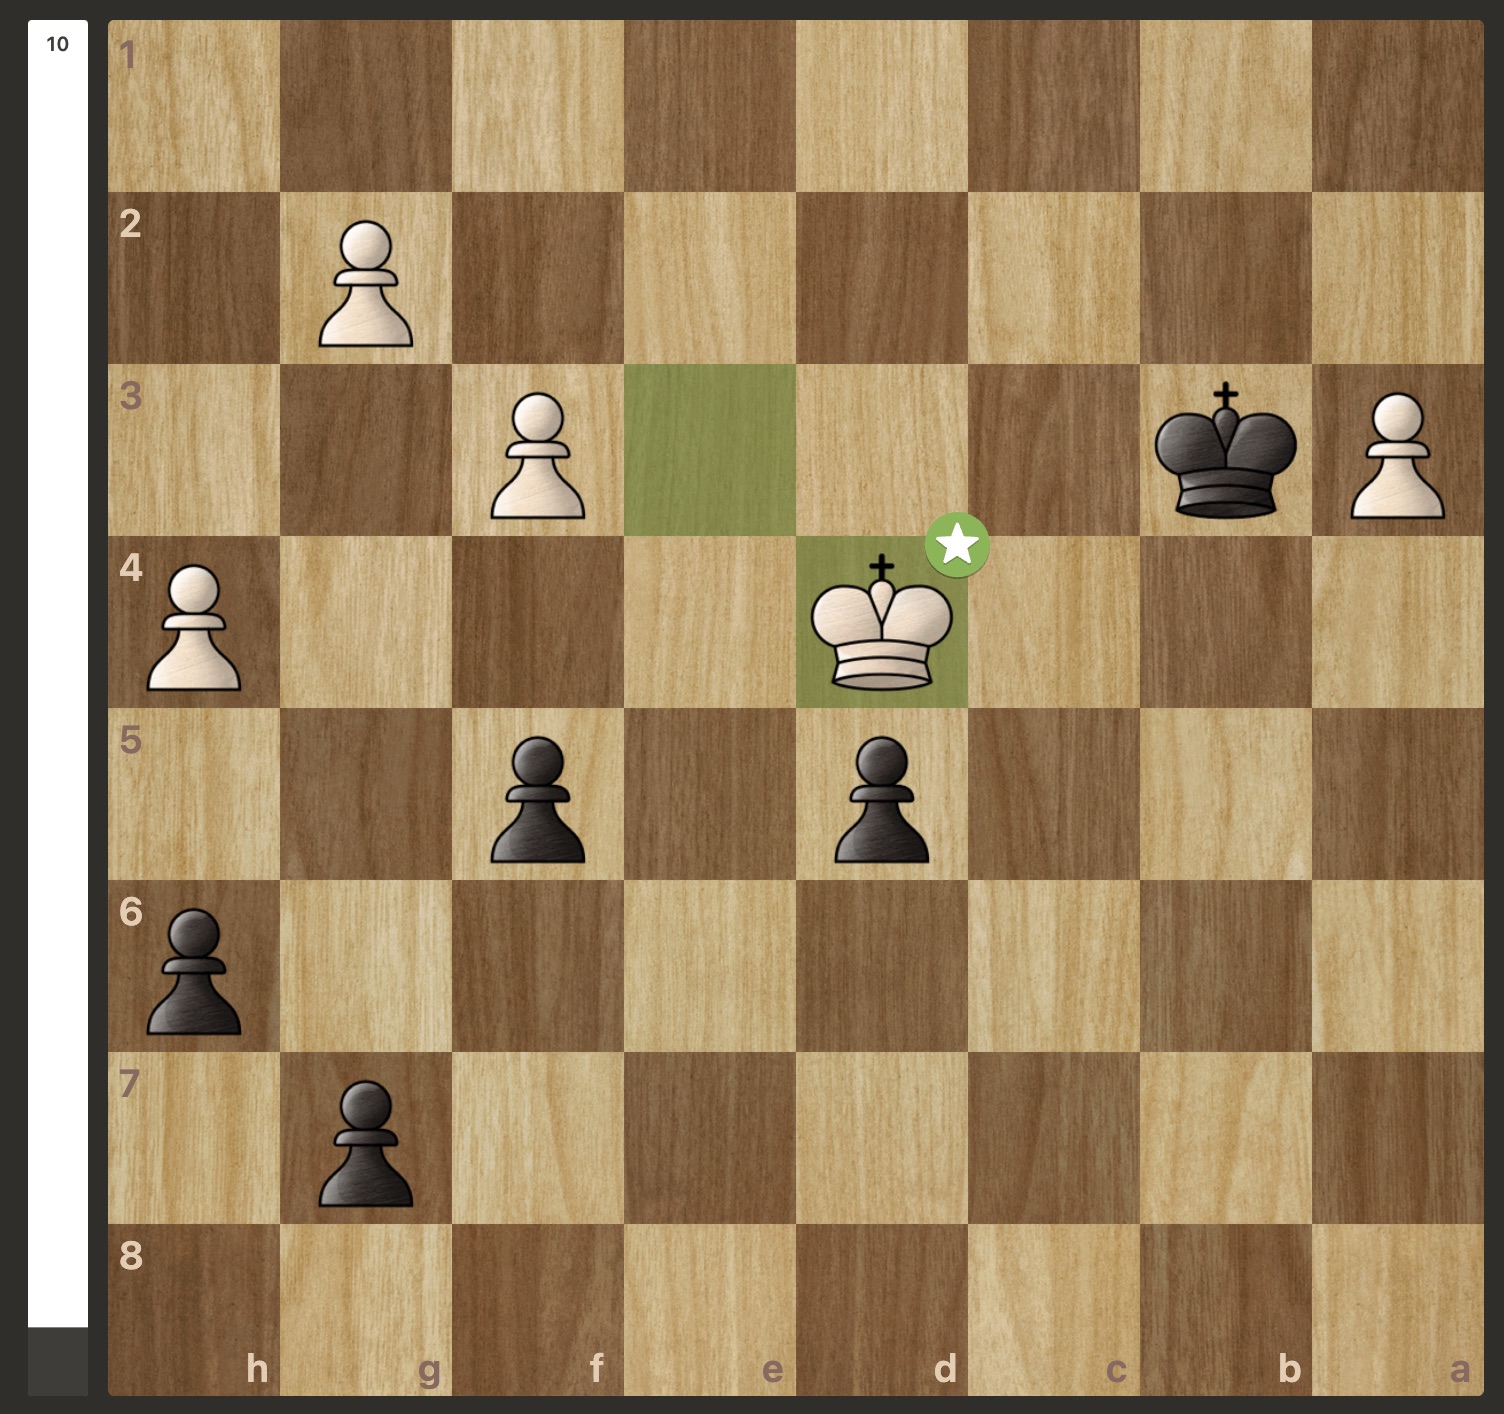
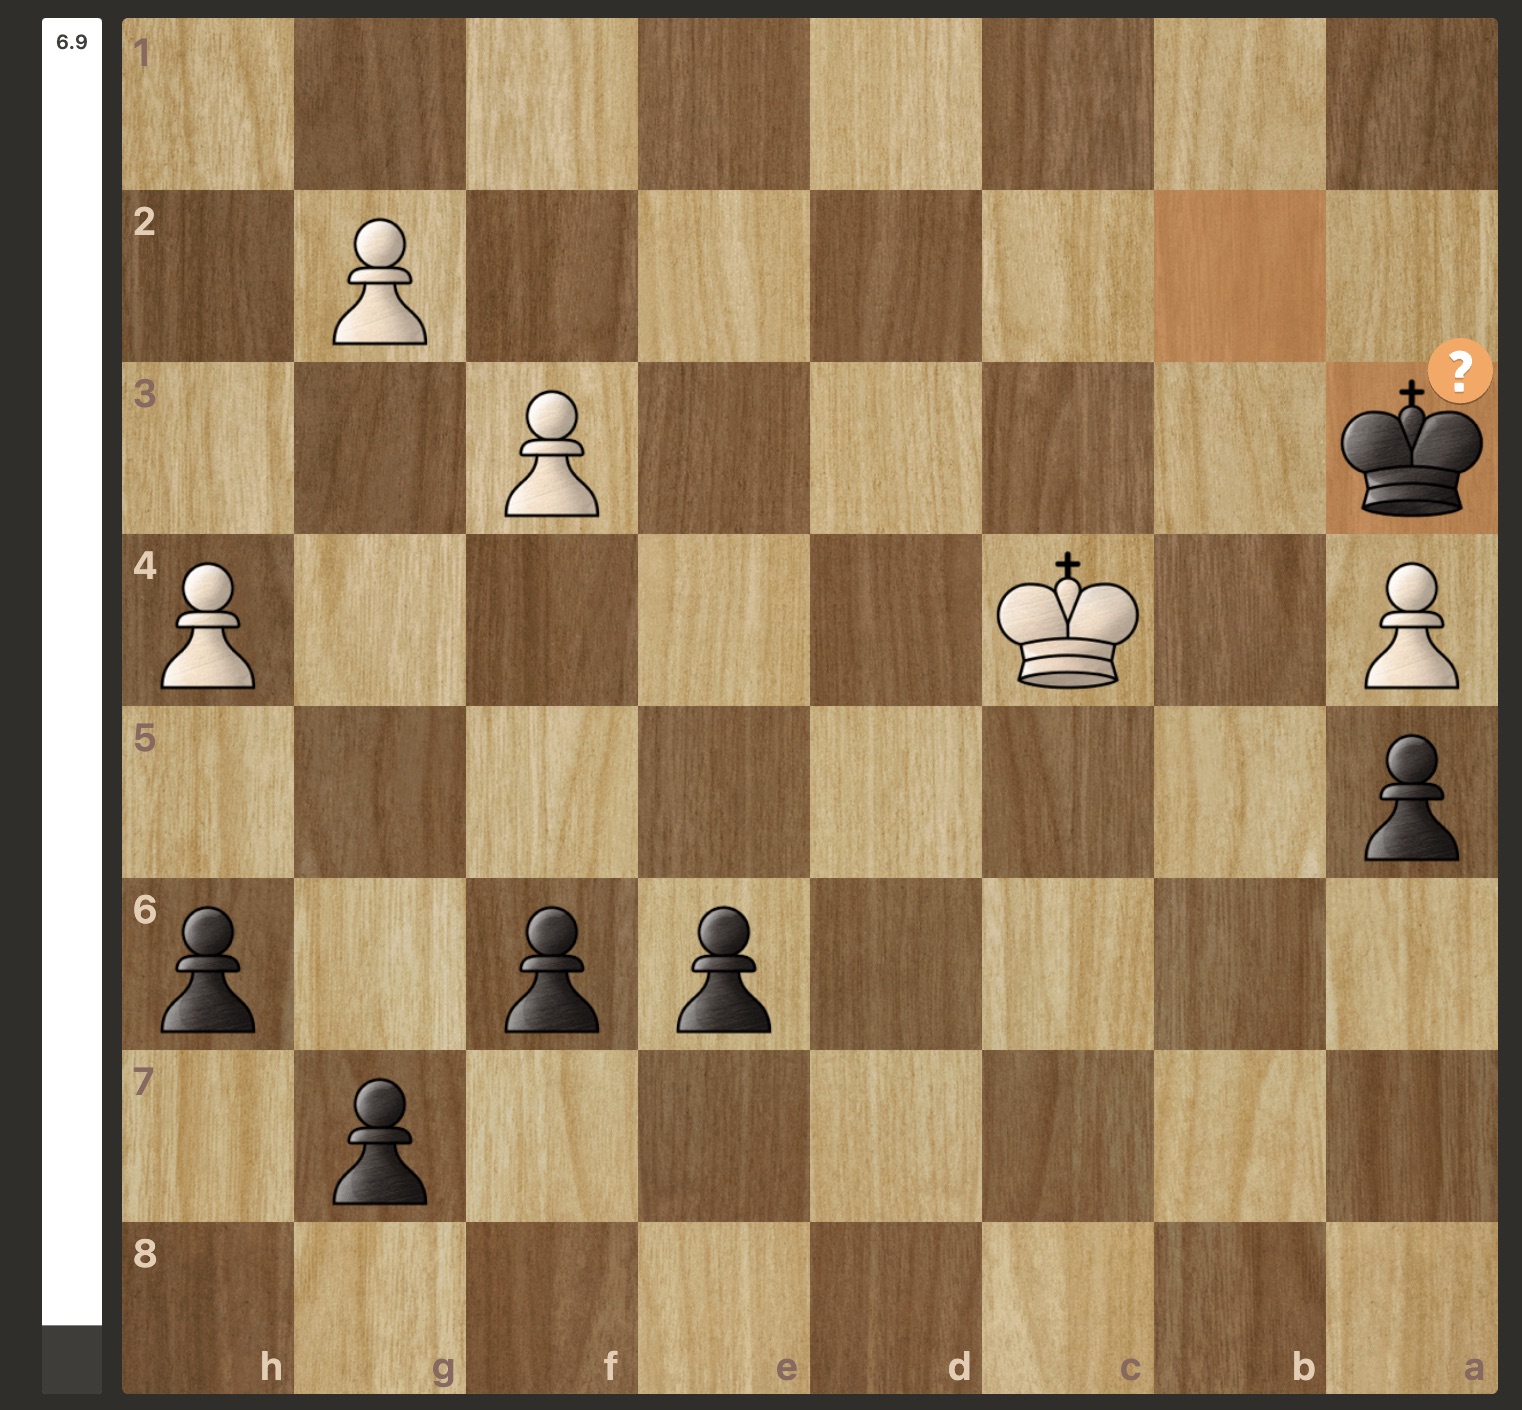
On move 43, I had achieved the following position, black to play:
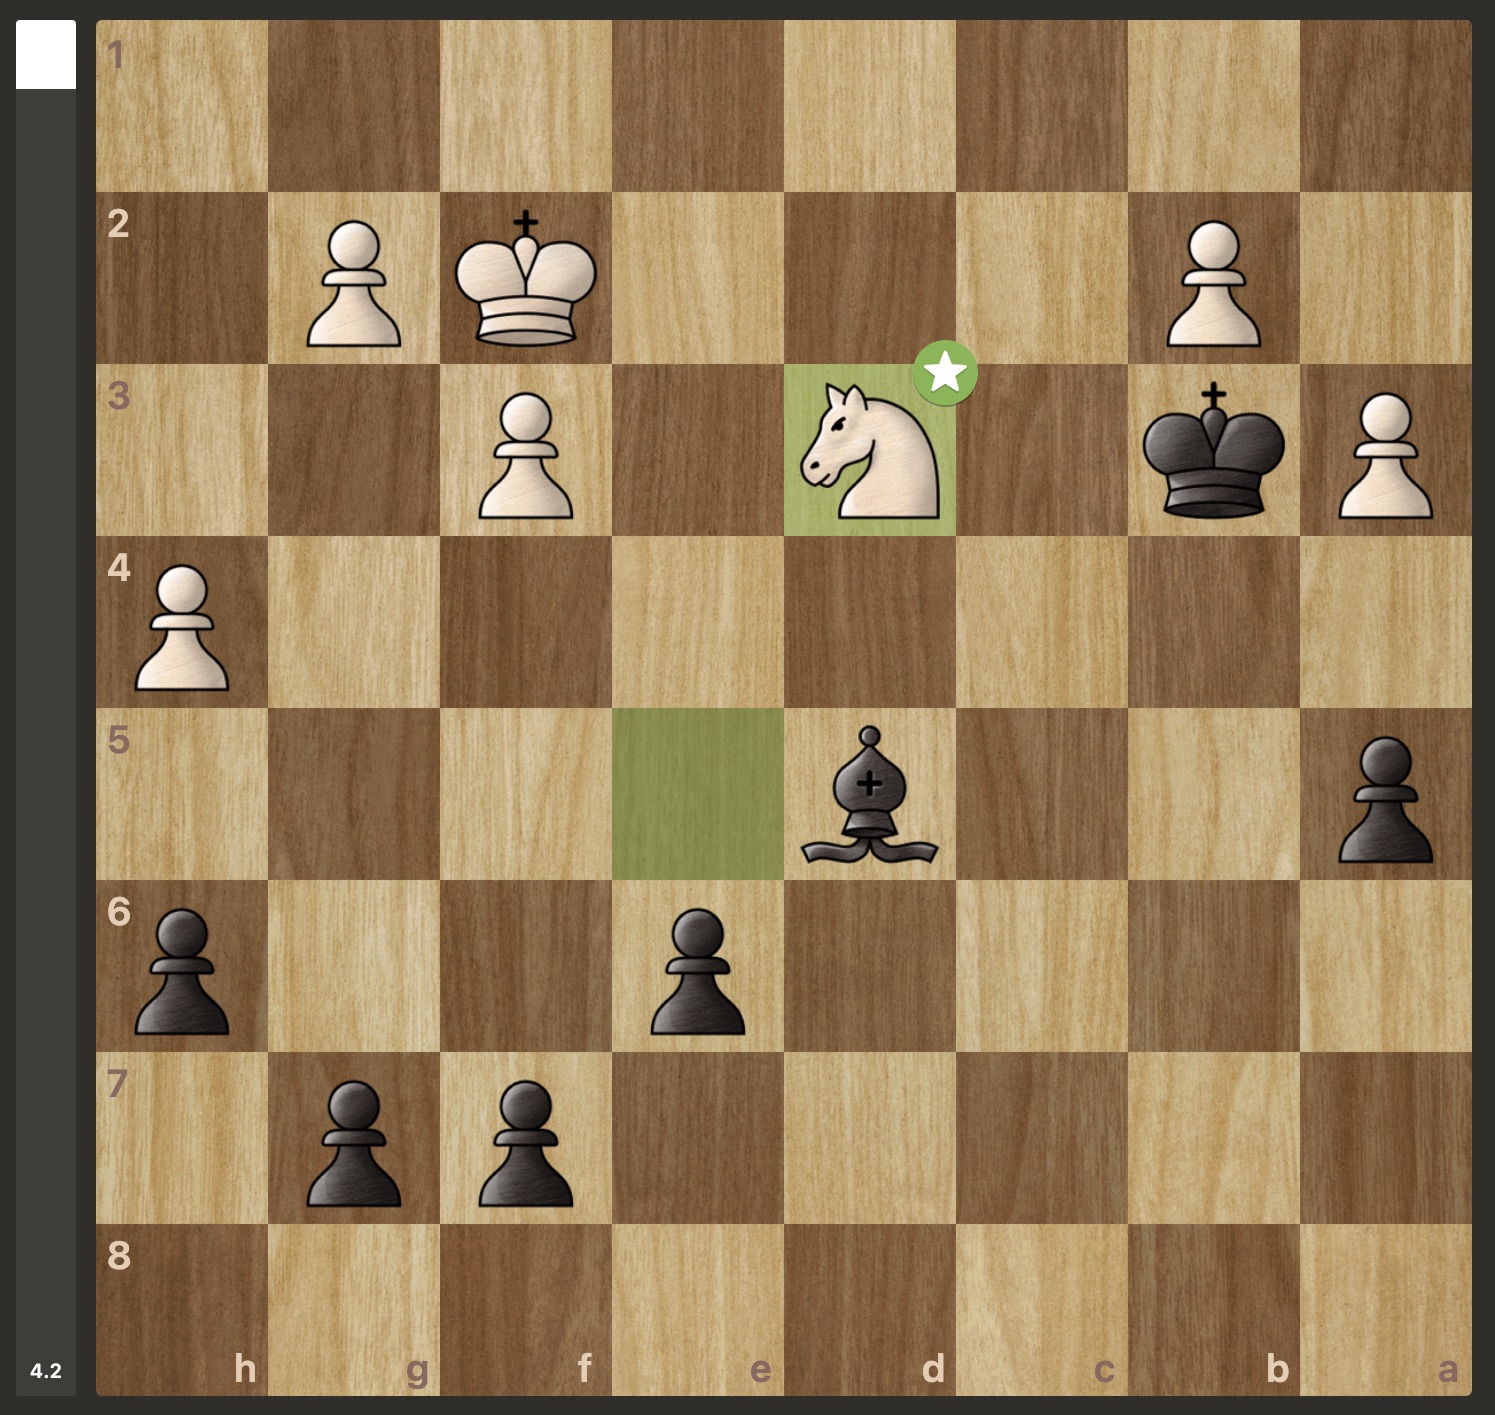
The position is winning for black due to the activity of the black king. The winning plan is simply to capture the B and A pawns, potentially trading the bishop for the knight, and then promoting the A pawn. White’s king is too far away for it to stop the promotion, and the 4-on-3 majority on the kingside (along with the pawns being connected along the 6th and 7th ranks), makes it impossible for white to generate any kingside counterplay in time.
The Losing Idea
The moves that I saw in this position were Bc4 and Kc2. Both have a similar idea of harassing the white knight, looking to remove it from its defence of the backwards b2 pawn. I first played Bc4, threatening to capture the knight, after which it jumped in to e5; the b2 pawn here is undefended, but cannot be captured due to the bishop hanging. I slid the bishop back to d5, he played the knight back to d3, and we again reached the above position.
Seeing that this was a repetition, I tried the other way of harassing the knight: Kc2.
Why is Kc2 an inaccuracy?
My thinking was that not only threatens the knight, but also in case of the knight moving it keeps contact with the b2 pawn, ready to capture it if permitted. One general reason that this move is inaccurate is that this allows white to simply bring his own king forward, defending the knight and bringing his king closer to the centre, but the key reason this loses is that it after the king comes to e3 and I played f5, white can now generate counterplay with b4 as the king no longer prevents the advance.
Why is f5 a blunder?
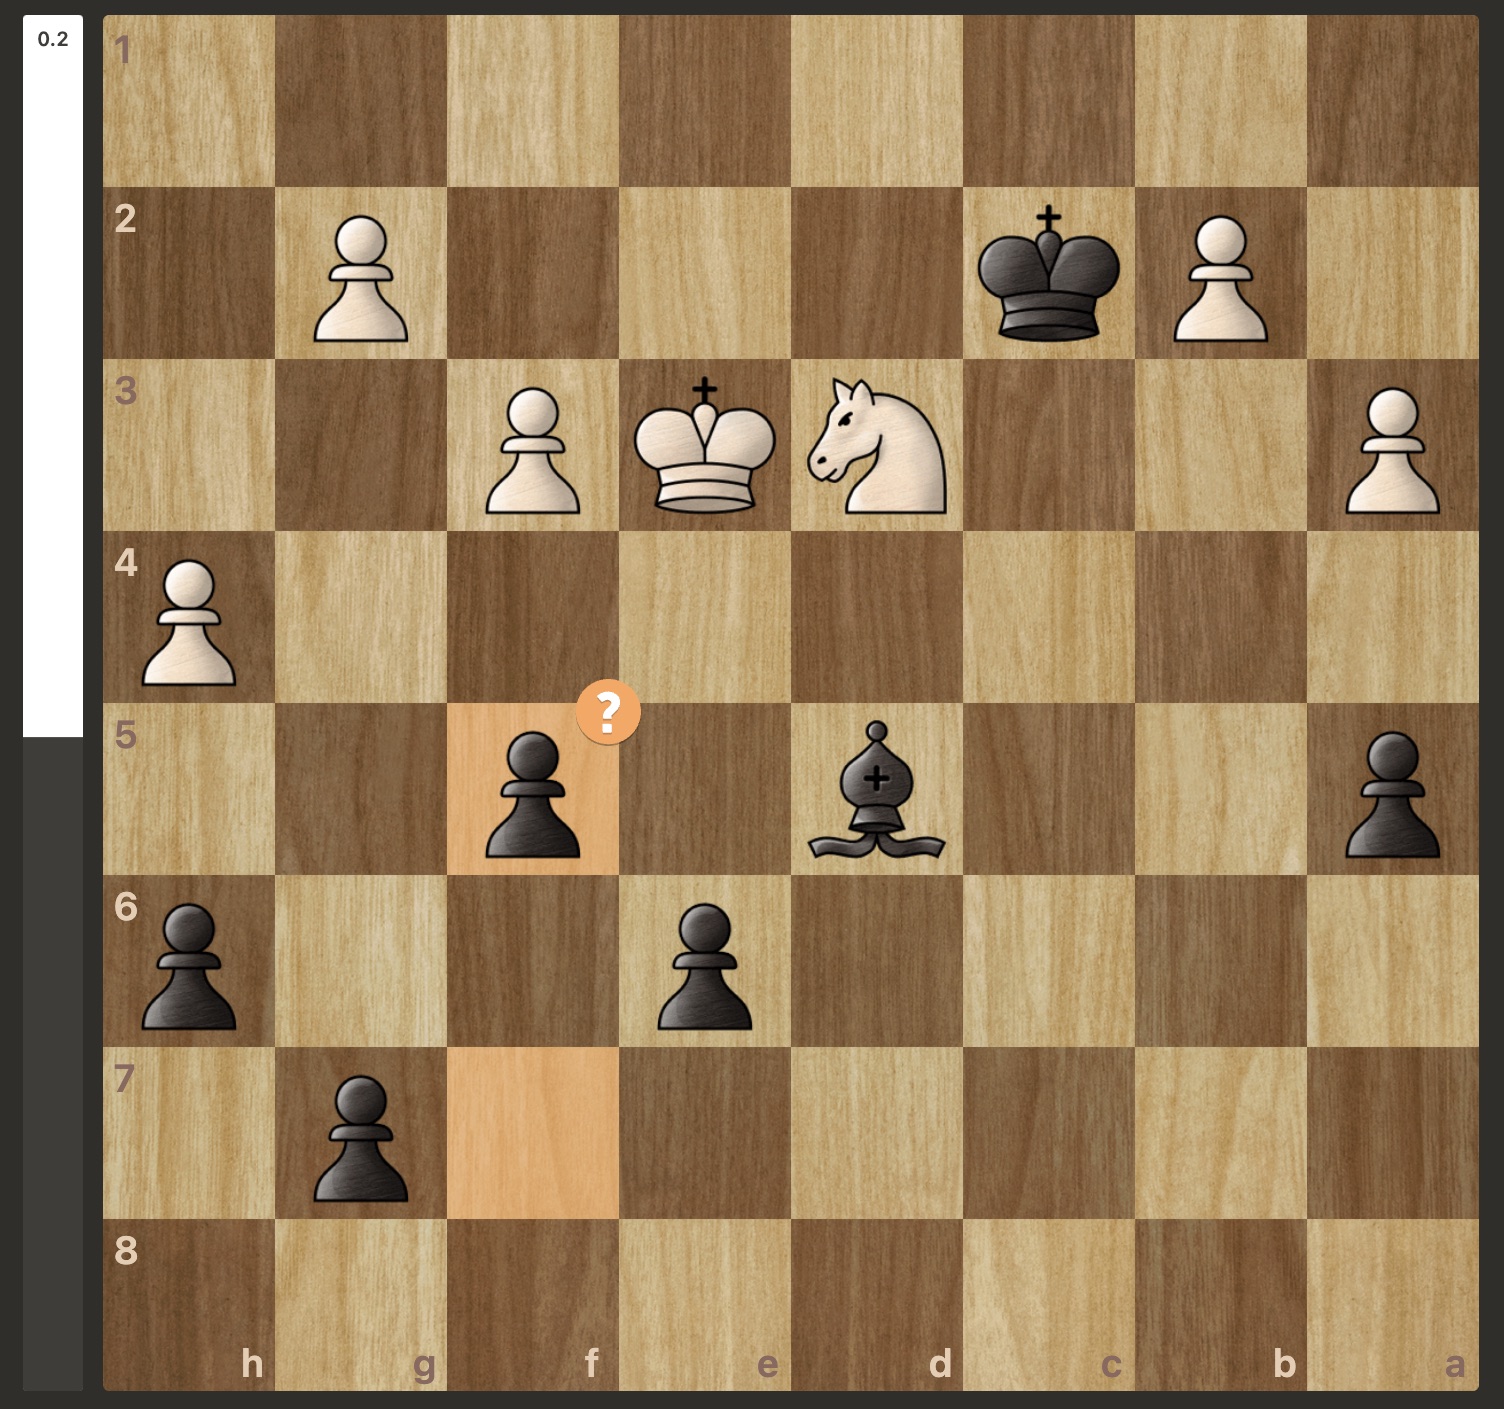
f5 is bad on multiple levels. This move actually blunders the game away, from an evaluation of +2 for black to -0.75. Positionally speaking this is an error as it greatly weakens the black kingside pawn structure; one of the key advantages of black’s position is that the pawns are all connected and cannot be easily attacked, and white is very slow to generate any counterplay on that side of the board. After f5, g4 now creates pawn tension and potentially undermines the e6+Bd5 central bishop outpost.
My idea with this move was to play f4+ and try distract the white king away from the defence of the knight (which could have been prevented very easily with g3, which I knew but couldn’t find a better move), but it fails to prevent the winning idea for white: b4!
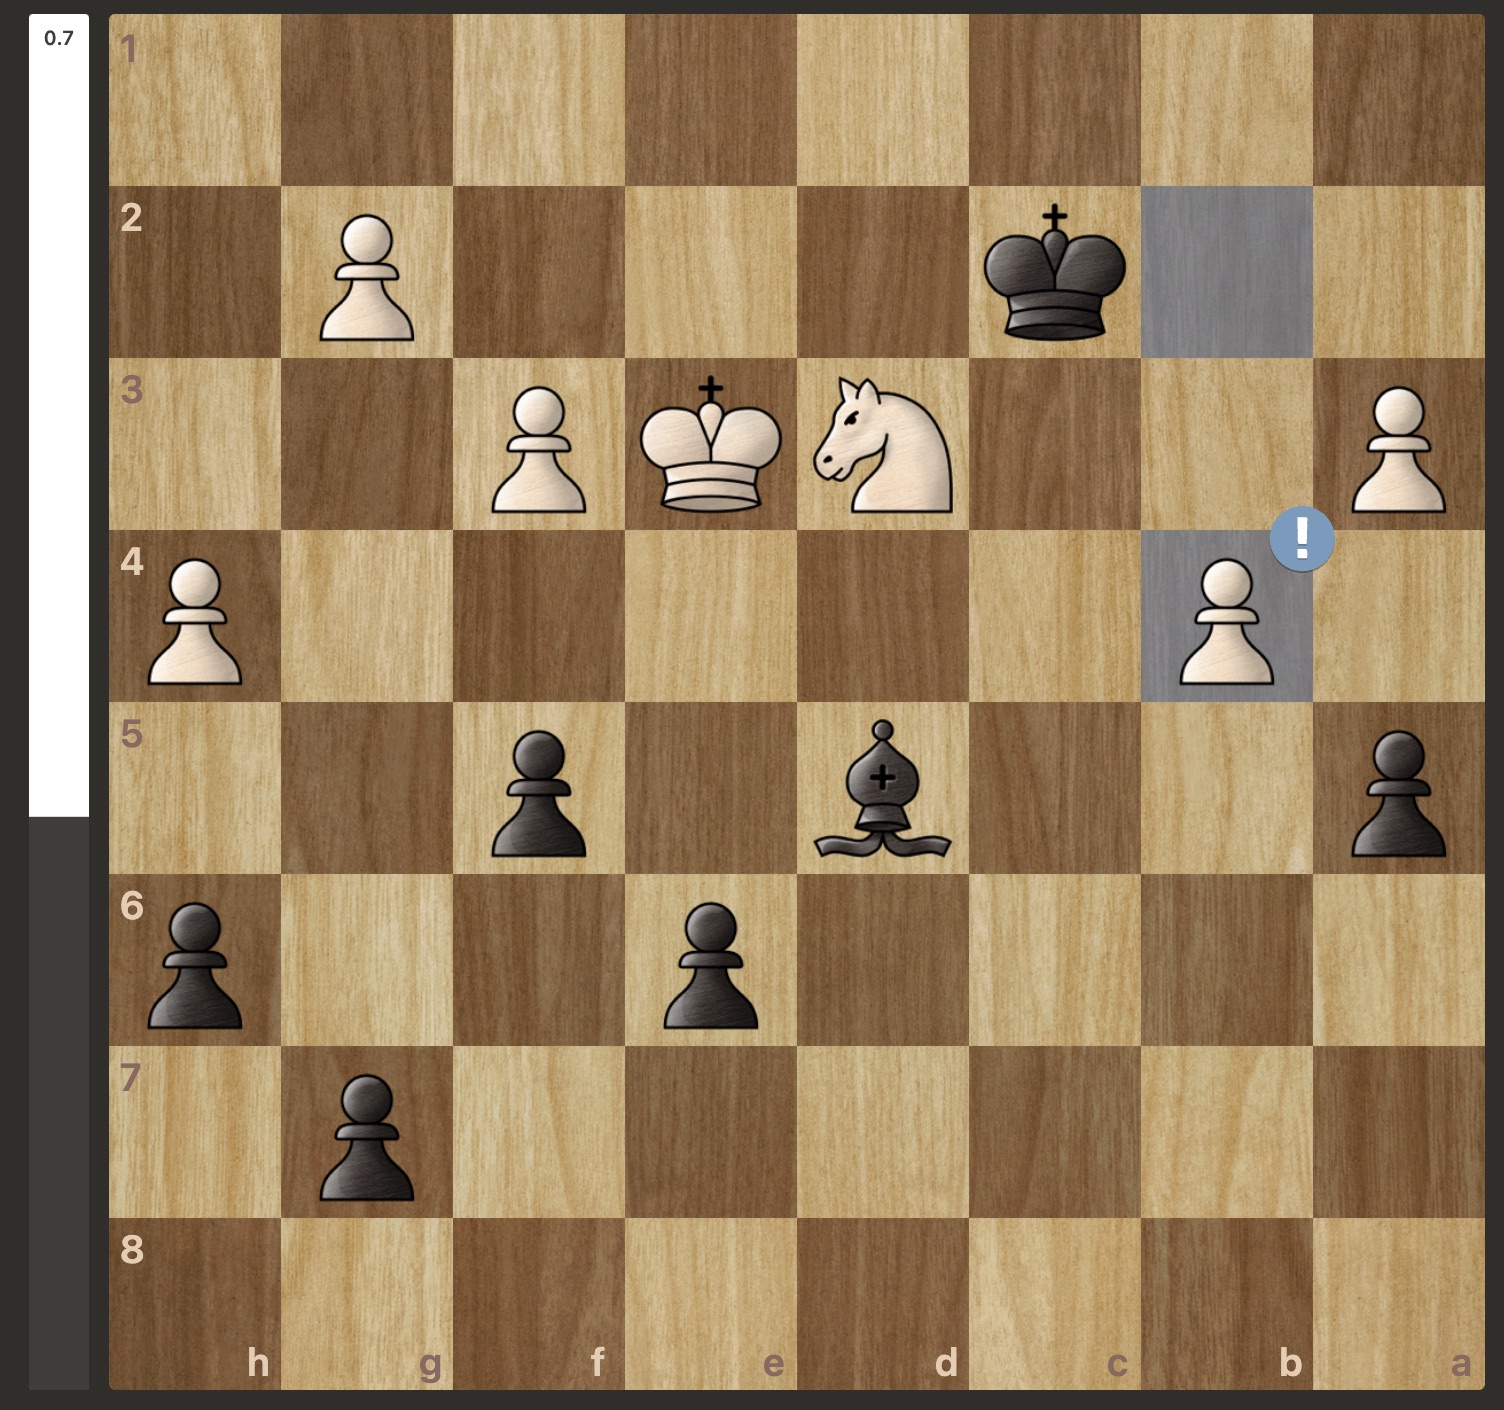
This is now close to winning for white. Blacks key winning idea in the position, namely capturing the b2 and a3 pawns and running the A pawn up the board, is now undermined. Black must now fight for a draw. Now, after Axb4 Nxb4+, we reach the final key moment in the game: Kb3??
Why Kb3 loses
Kb3 takes black’s king one critical step away from the defence of the kingside and centre. In this position, white captures with Nxd5, and after the pawn recapture Exd5 white is now free to move his king forward and win blacks only remaining asset.
Black can resign here.
What if Kc3 instead?
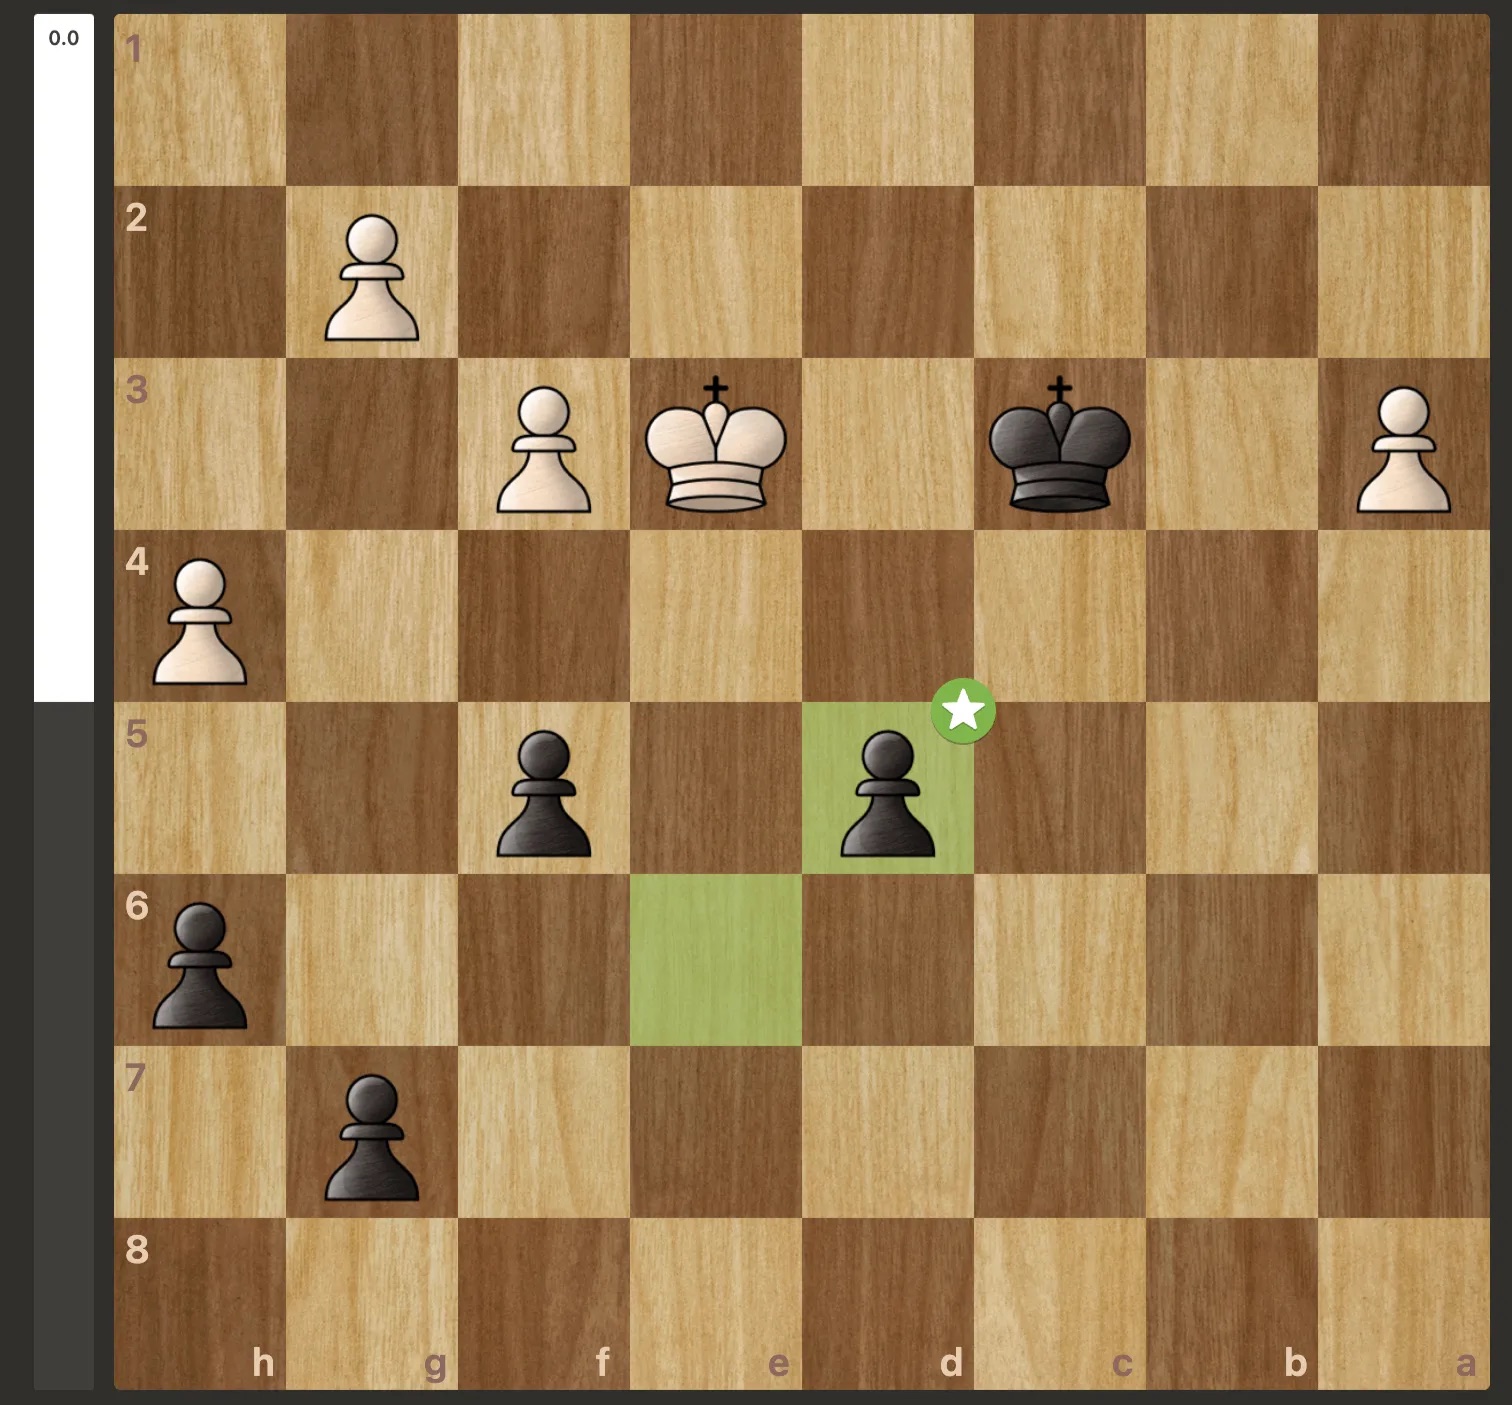
After Kc3, Nxd5+, Exd5, we reach the above position. This is a draw by repetition (Ke2, Kc2, Ke3, Kc3), as white simply does not have time to march the A pawn down the board as black is quicker to the mark. In fact this can easily be lost by white after the natural-looking a4, black has the forcing continuation:
…d4+! Ke2! Kc2! (every other move loses) a5 d3+! and black promotes.
The Winning Continuation
The best move here, taking into consideration the ideas from before, is not to move the bishop nor the king, but instead to simply restrict the white knight from making any useful move: f6!
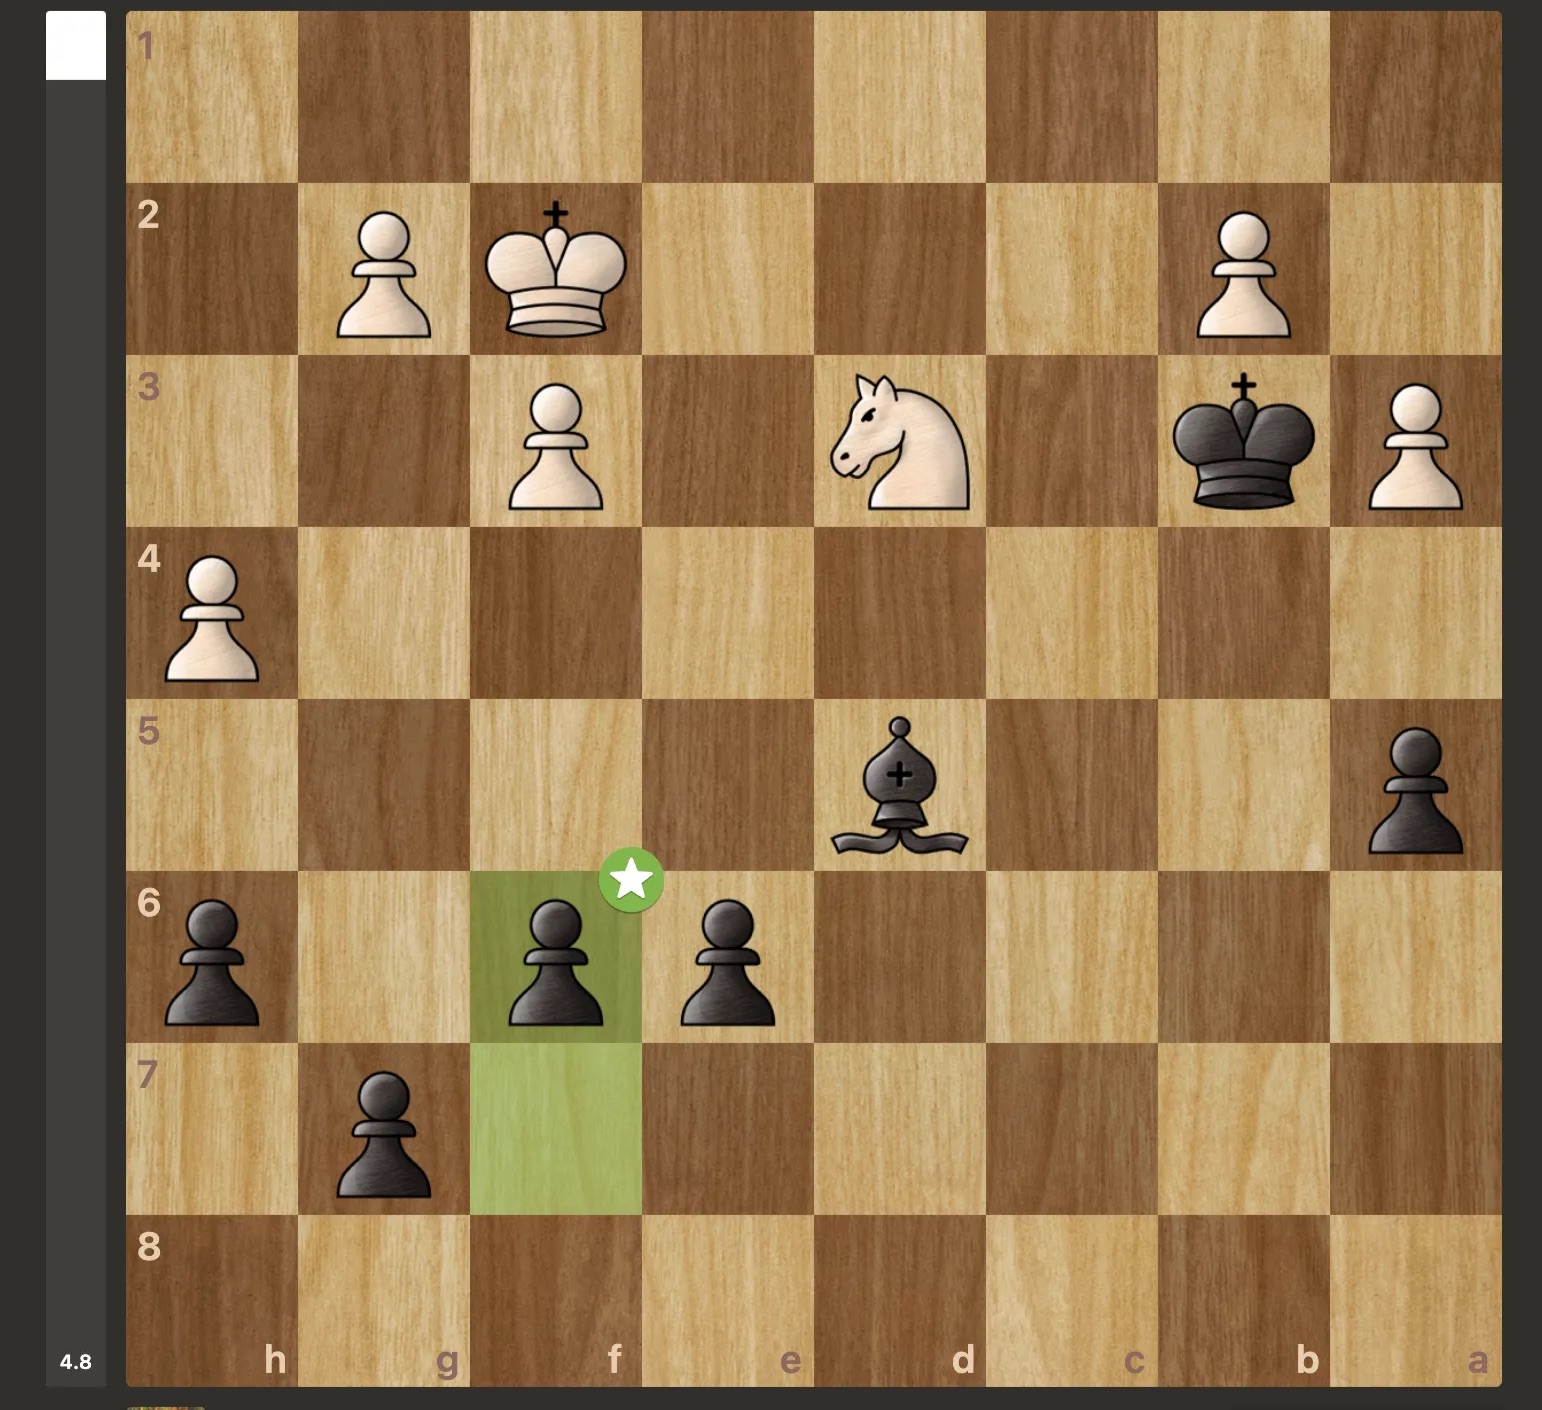
Now with the pawn on f6, white can no longer jump the knight to e5 and threaten the bishop after Bc4. What does white even do here? After Ke3 Bc4 Nc5+ Kxb2 Kd4 Bd5, the position is as follows:
Black is clearly up a pawn, and likely to win the A pawn as well. After a4 Ka3, this is close to a zugzwang for white. The engine recommends f4, sacrificing the G pawn entirely. Black has no problems promoting the A pawn in this line.
Still blunder-able..
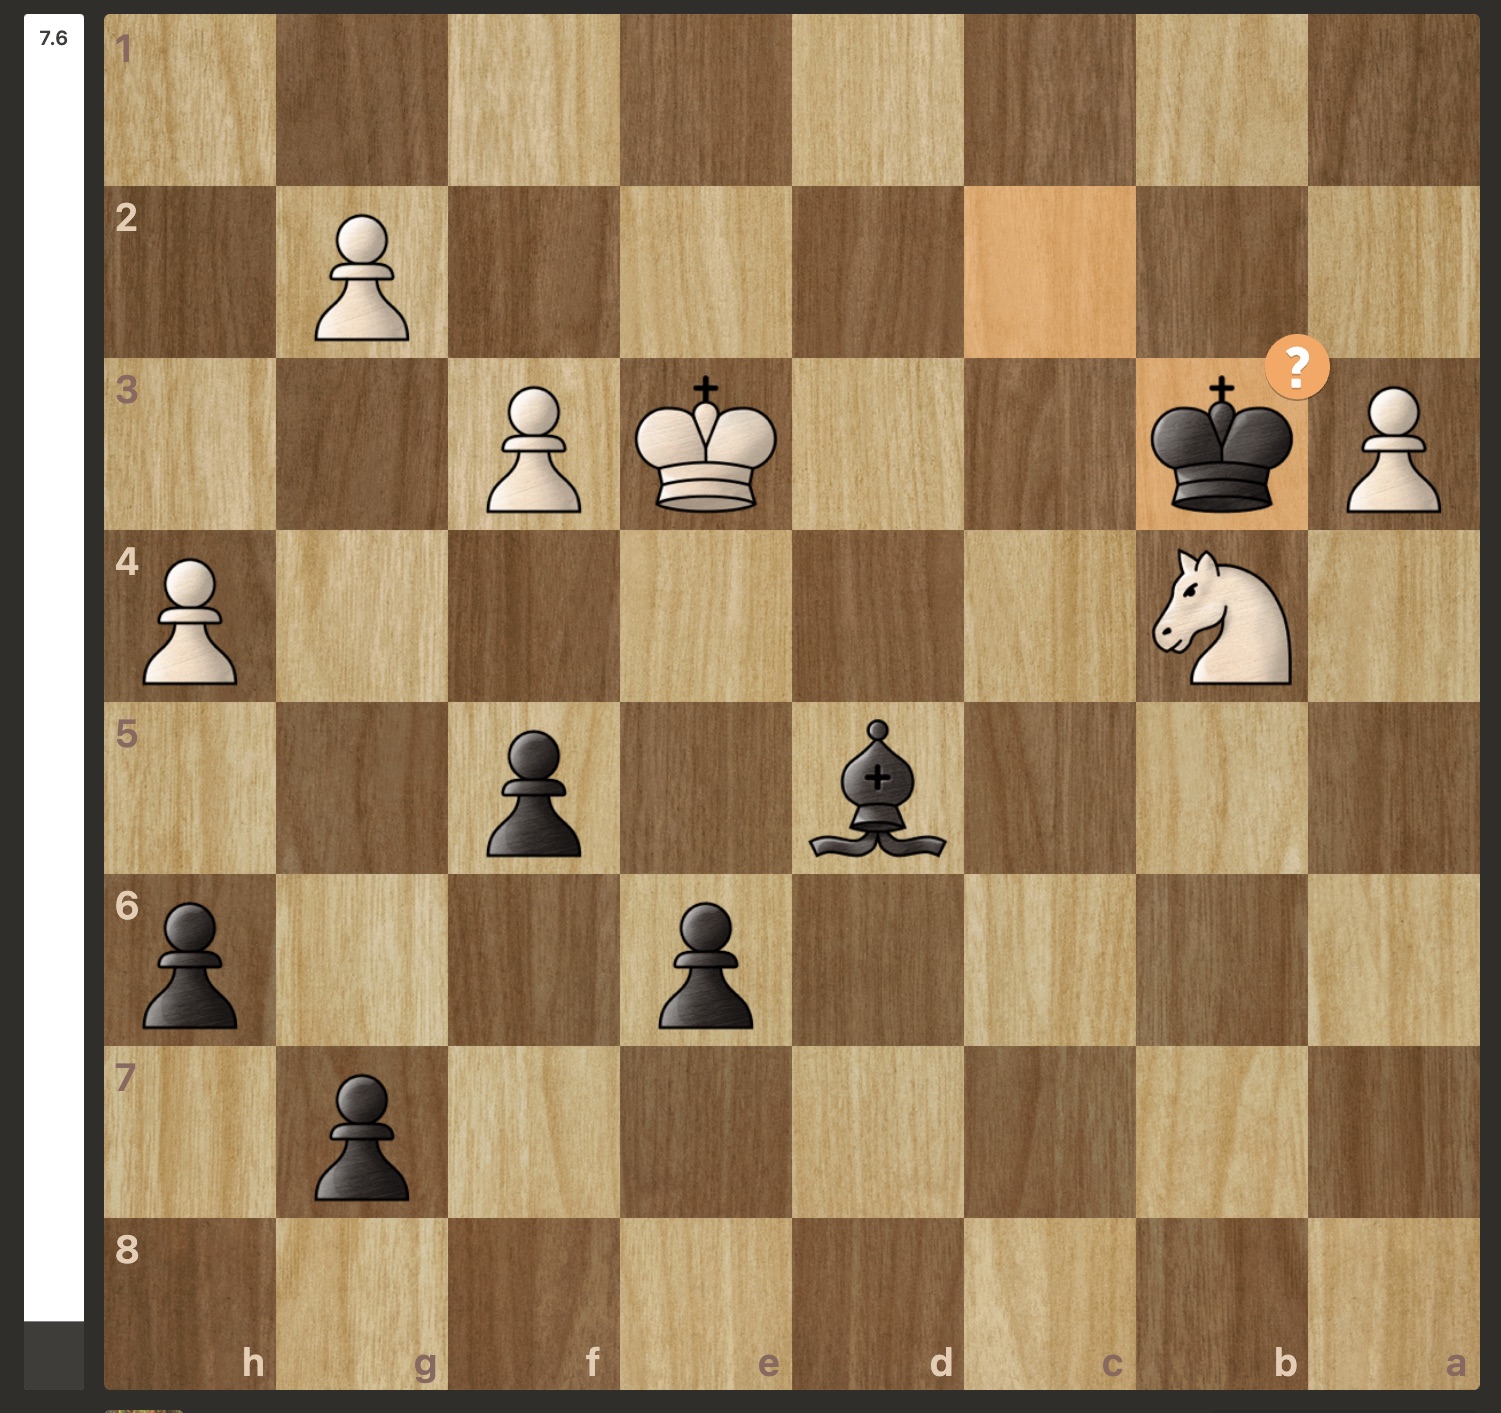
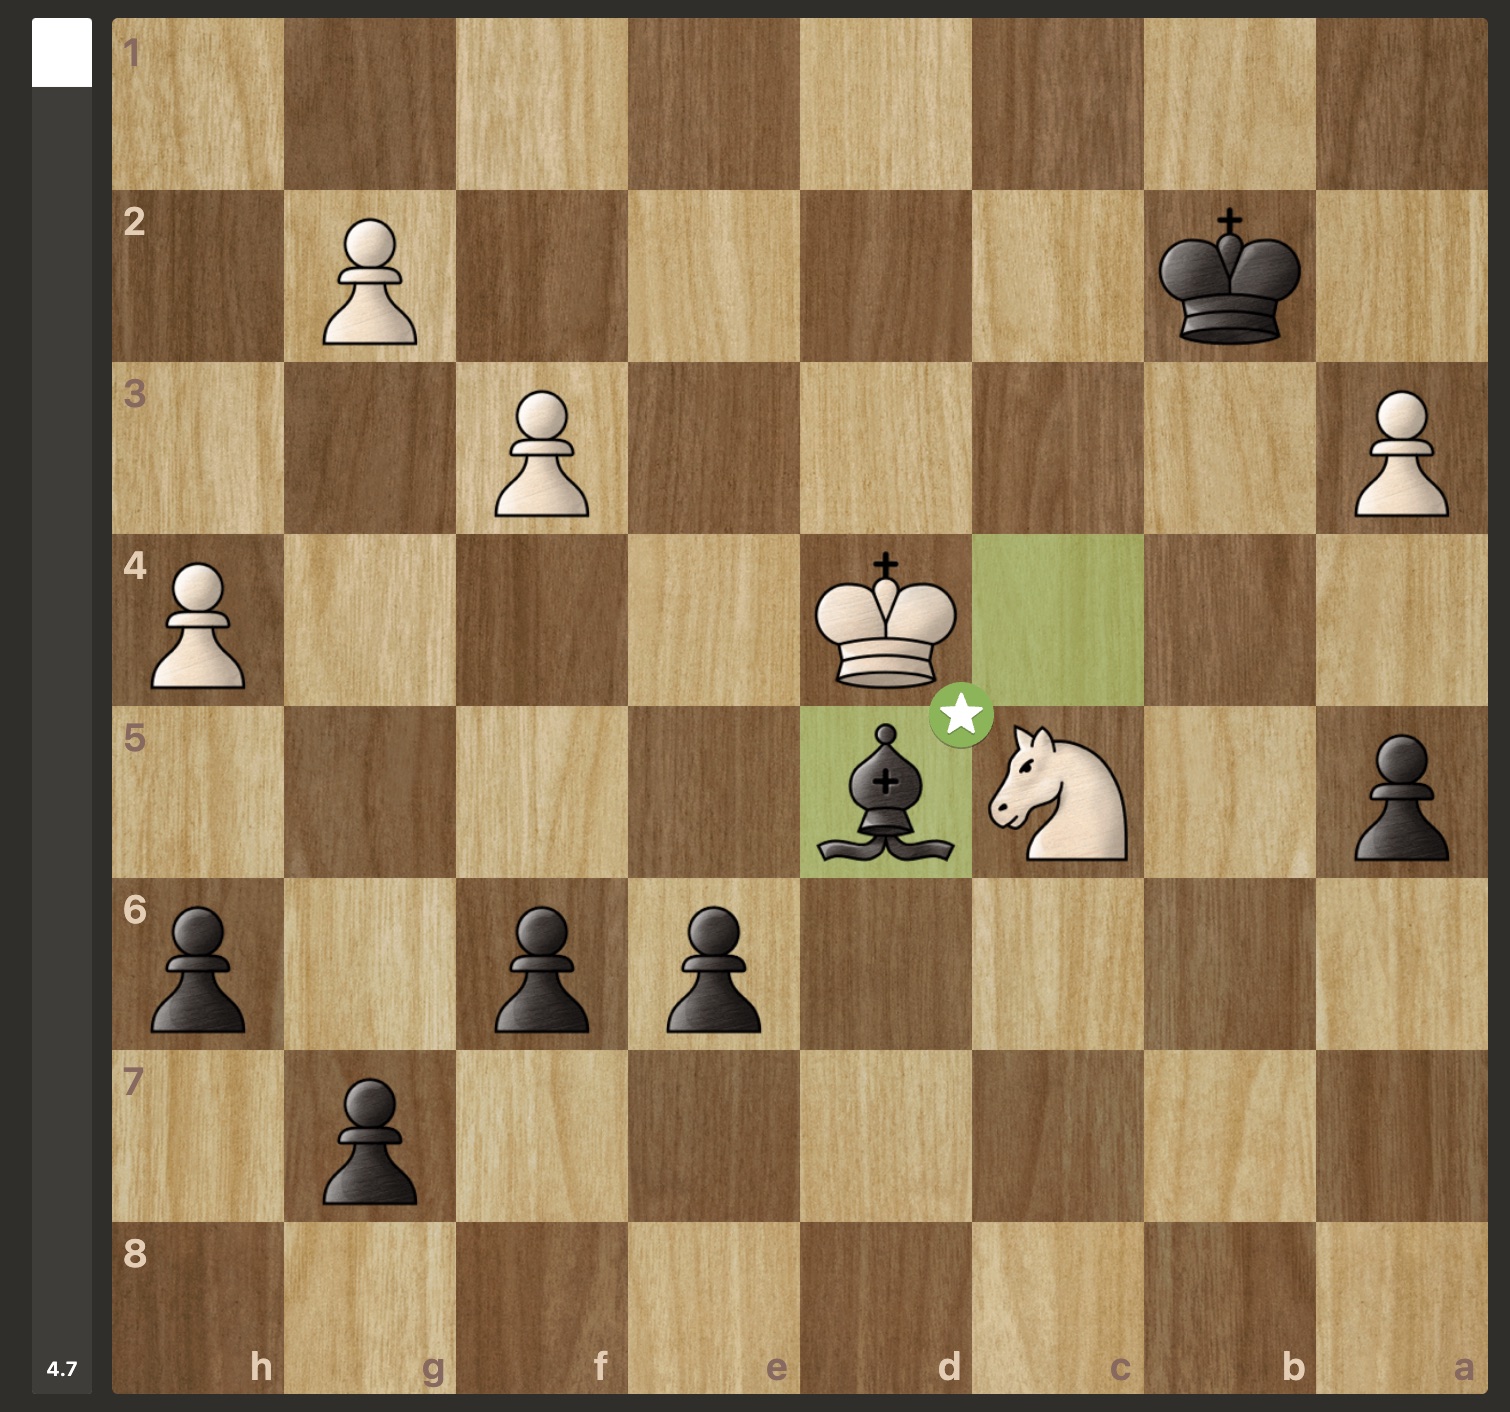
One possible way to throw the game occurs after …f6 Ke3 Bf4 a4, where after the trade Bxd3 Kxd3 Kxb2 and Kc3, the game can still be lost in one move as we see here:
This somewhat natural move, going after the A pawn, loses immediately to Kb5! and black can no longer defend his own A pawn. The character of the position has changed fundamentally in the past couple of moves, while the minor pieces were still on the board the king really wanted to be over on the queenside threatening the advance of the A pawn, but now in this king and pawn endgame there is no way for black to immediately win the A pawn. Instead, black must make use of his 4-on-3 kingside majority to distract the white king away from the defence of the A pawn, after which black can capture and run the pawn up the board.