Two Bishops, Two Choices
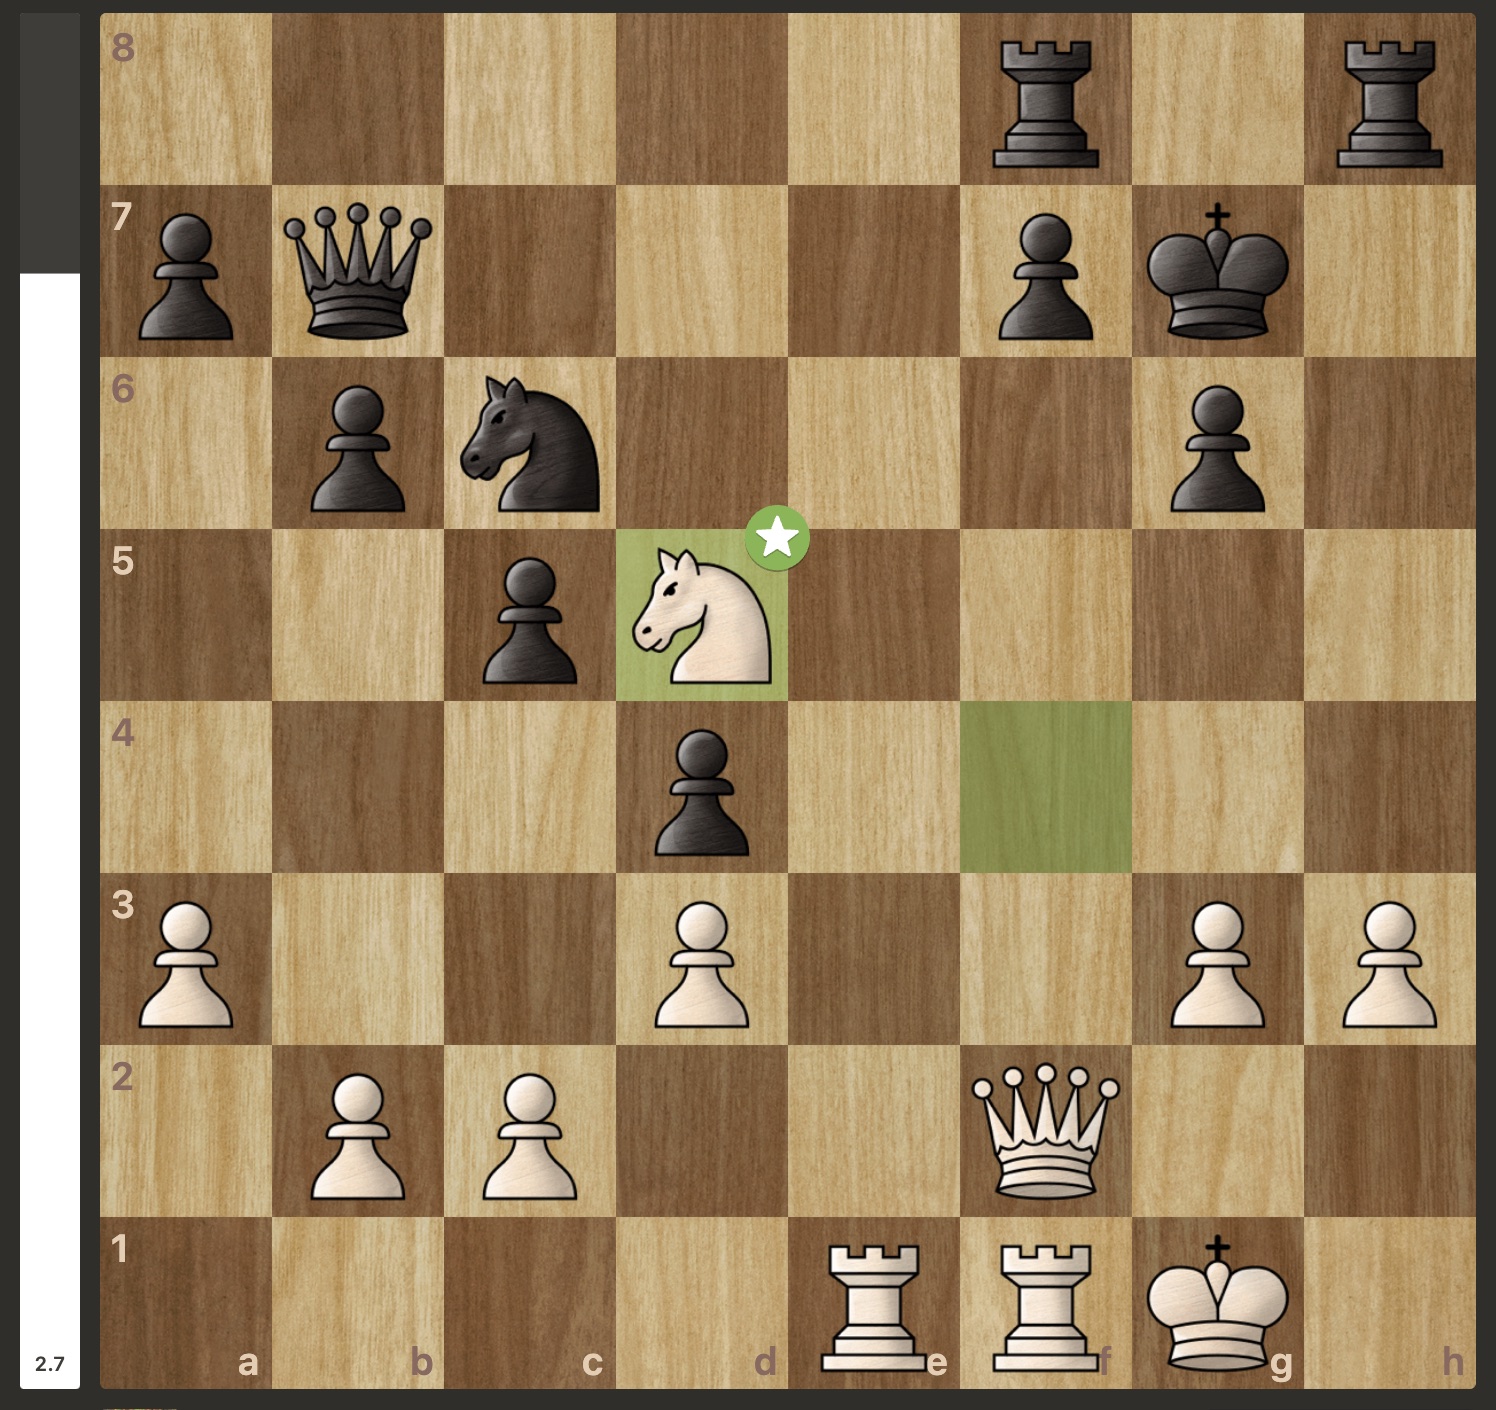
Starting Position
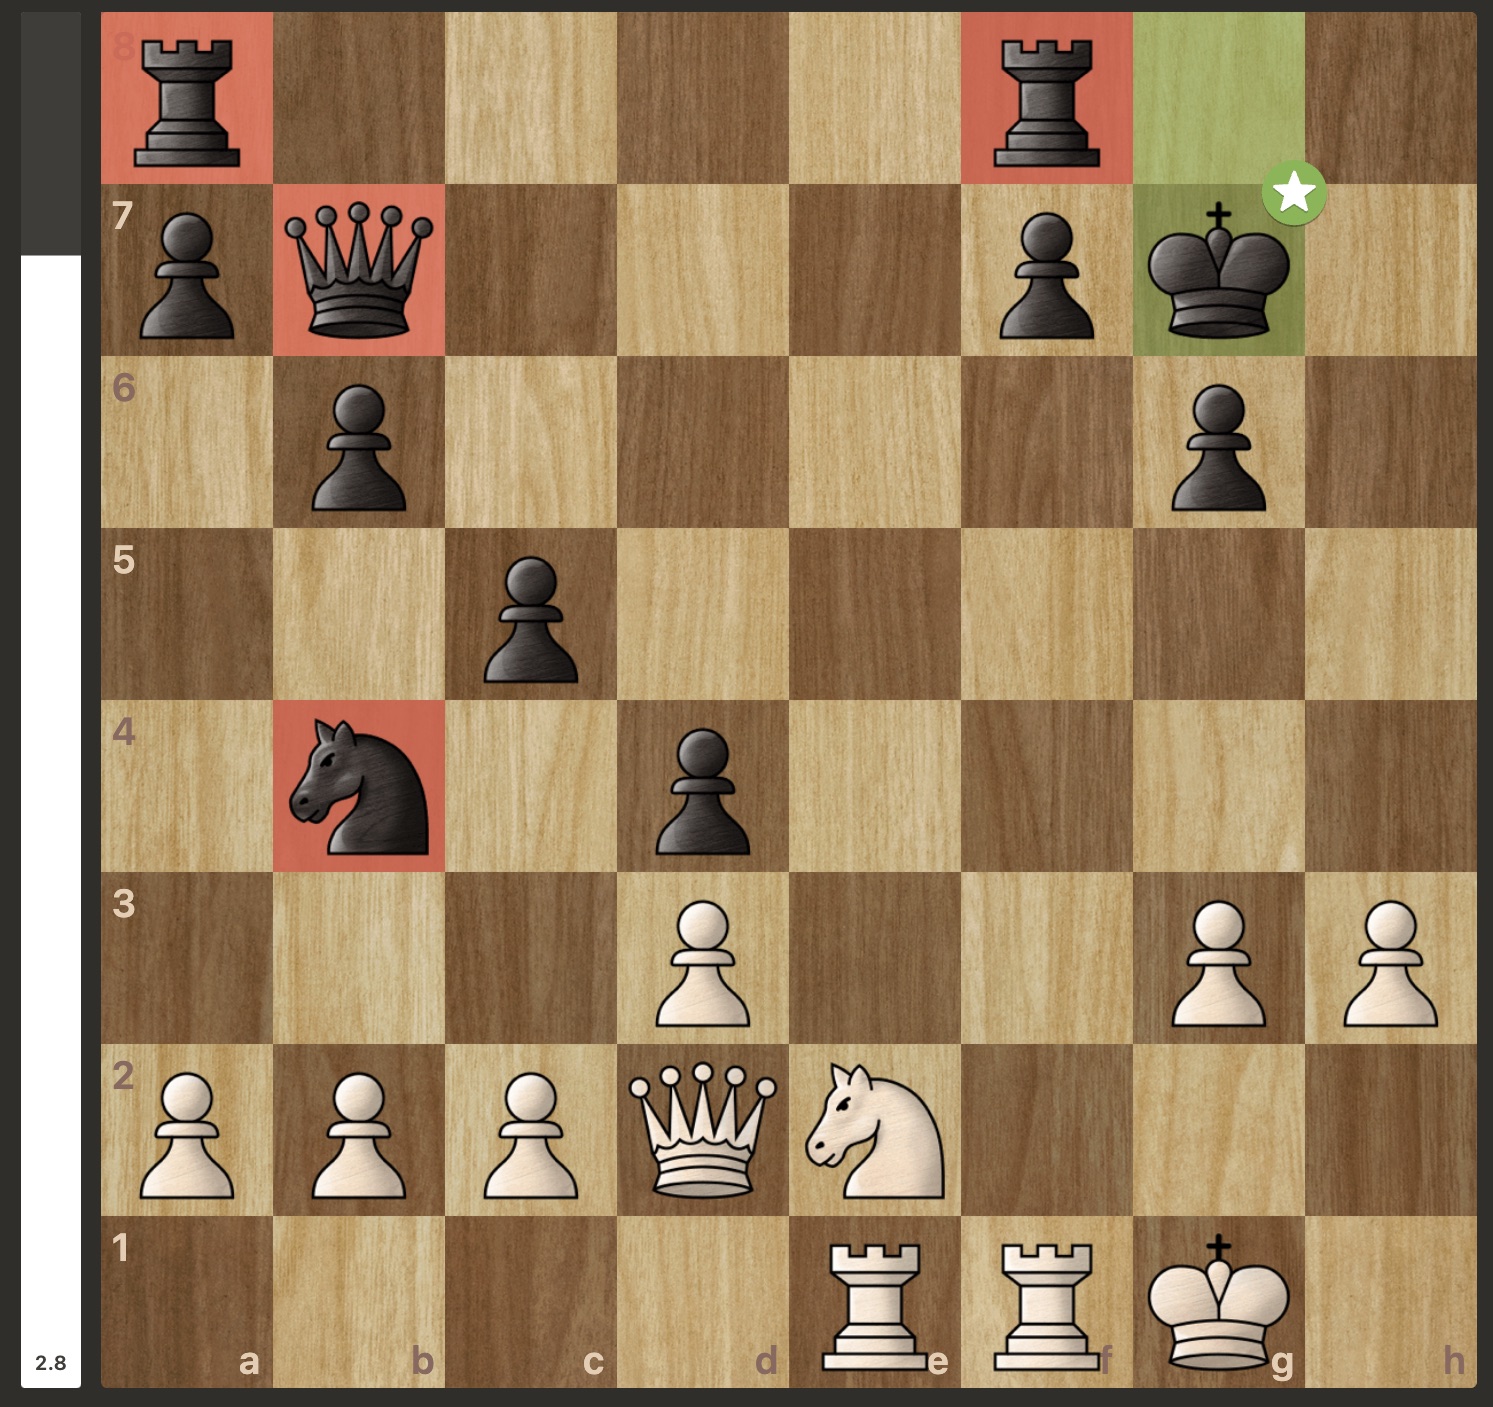
Before 18… Nb4?, the position is dead equal, but after this move has been played the engine evaluation drops all the way down to nearly +3 for white. The evaluation seems normal at first (+0.5 for white) but as the engine has time to think the evaluation just keeps climbing and climbing. There’s no immediately hanging pieces, so where does this evaluation come from? It’s reading as if black has just lost a full piece…
Candidate Moves
A3
Logical, the pawn is attacked, and the knight is there just asking to be given the boot, so a3 both attacks the knight and prevents losing the pawn. A counterpoint to this idea is as follows; how valuable is the a2 pawn right now? The knight is incredibly passive on b4 and if it were to capture on a2 it simply has no role in the game at all, at least from b4 it can possibly jump back in to d5 and argue that it is now better placed (more centralised) than before, and is threatening to at some point jump into the outpost on e3, which would be crushing.
More concretely, there is an engine refutation of a3 that reads at around a -2 advantage for black, centred around the hopping into the e3 square with check. a3 Bxg2 Kxg2 Nd5 Bxg7 Kxg7 and there’s no way to stop Ne3, either losing the exchange immediately or having to deal with possibly the best-placed knight that’s ever existed:
Bxg7
What I played in the game. Black can refute this move and maintain equality, but only by first taking on g2 with the bishop. After Bxg7 Bxg2 Kxg2 Kxg7, the position is equal:
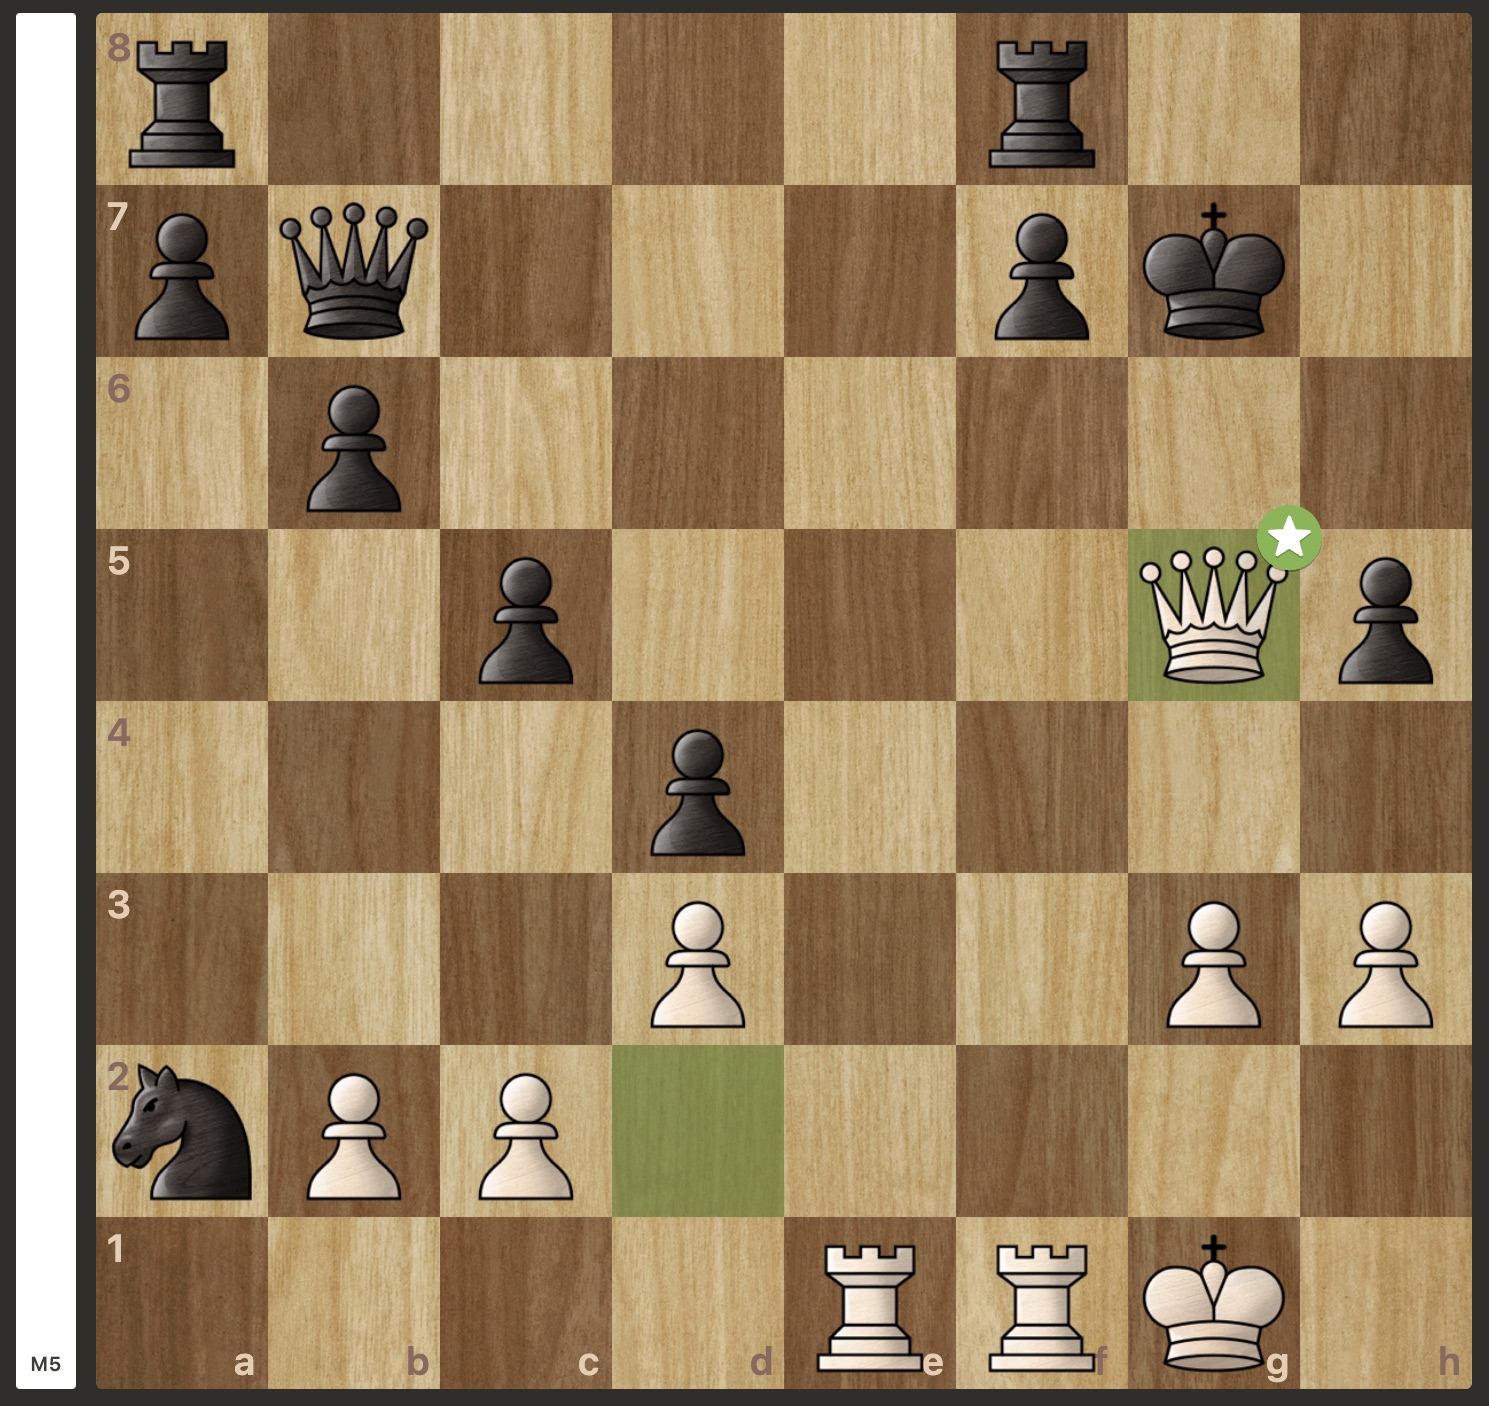
Interestingly, the immediate recapture with the king is a blunder as it allows Nf4!, which is the main winning idea in this whole position. We will cover why this move is so strong in the next section.
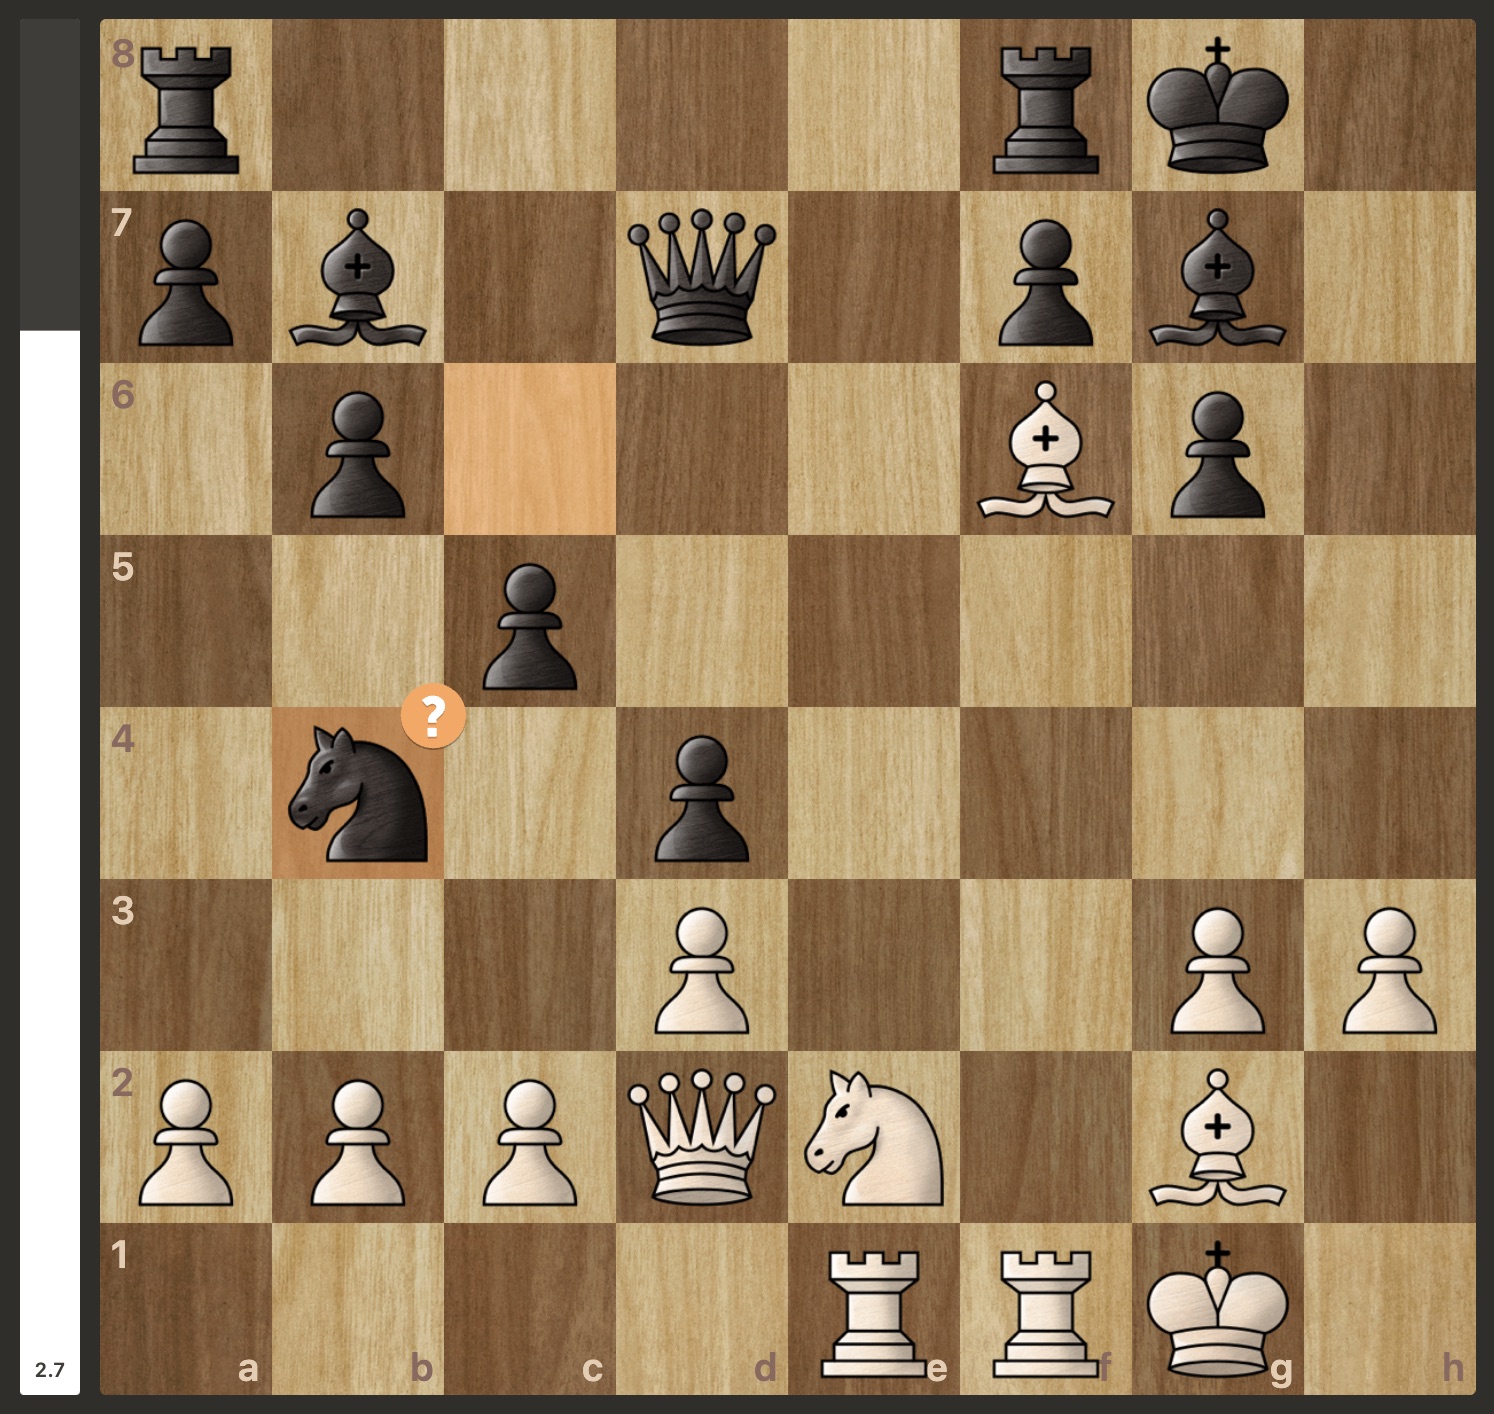
Bxb7 - The (Only) Winning Move
I had saw and considered Bxb7 in-game, but ultimately didn’t spend much time on it and didn’t see the potential in it. The judgement I made in the moment was that after Bxb7 Qxb7, the black queen seemed well placed on the a8-h1 diagonal staring directly into the white camp. As it turns out however this really isn’t where the queen wants to be, in fact it would much rather stay where it is on d7 as from there it eyes the weak h3 square; one can imagine Rh8 Rh7 and Rah8 being very unpleasant for the white king if black were given the chance to set that up.
A further reason why the queen is misplaced on b7 is that by moving there it relinquishes any influence it had over the kingside - on its own this might not be so bad, the queen only needing one move to get back into the action and so forth, but when paired with the wayward knight on b4 and both the black rooks being dormant, black suddenly finds himself scrambling to meaningfully coordinate his pieces, while the white pieces are all already in place to start pushing the initiative:
Okay, so white’s piece coordination is better, whoopty-do, how do you actually win this position?
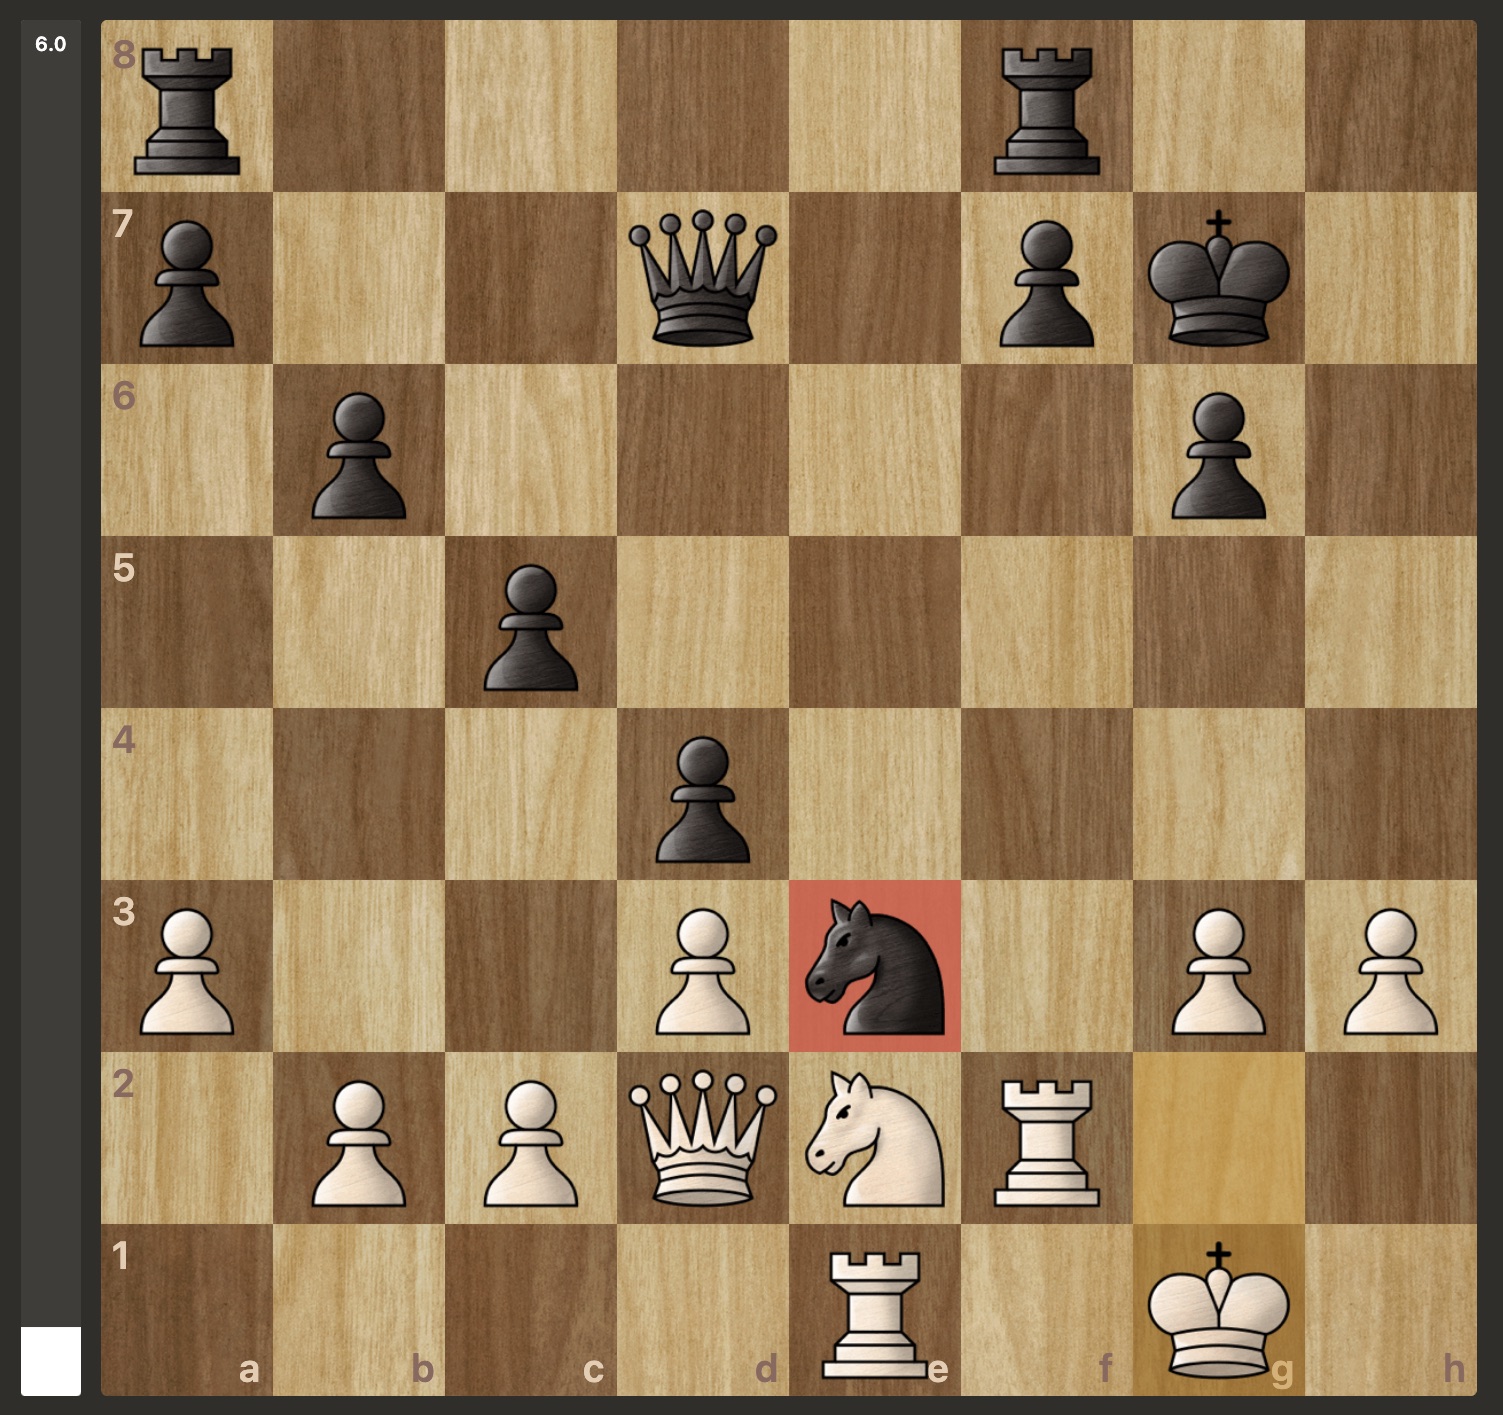
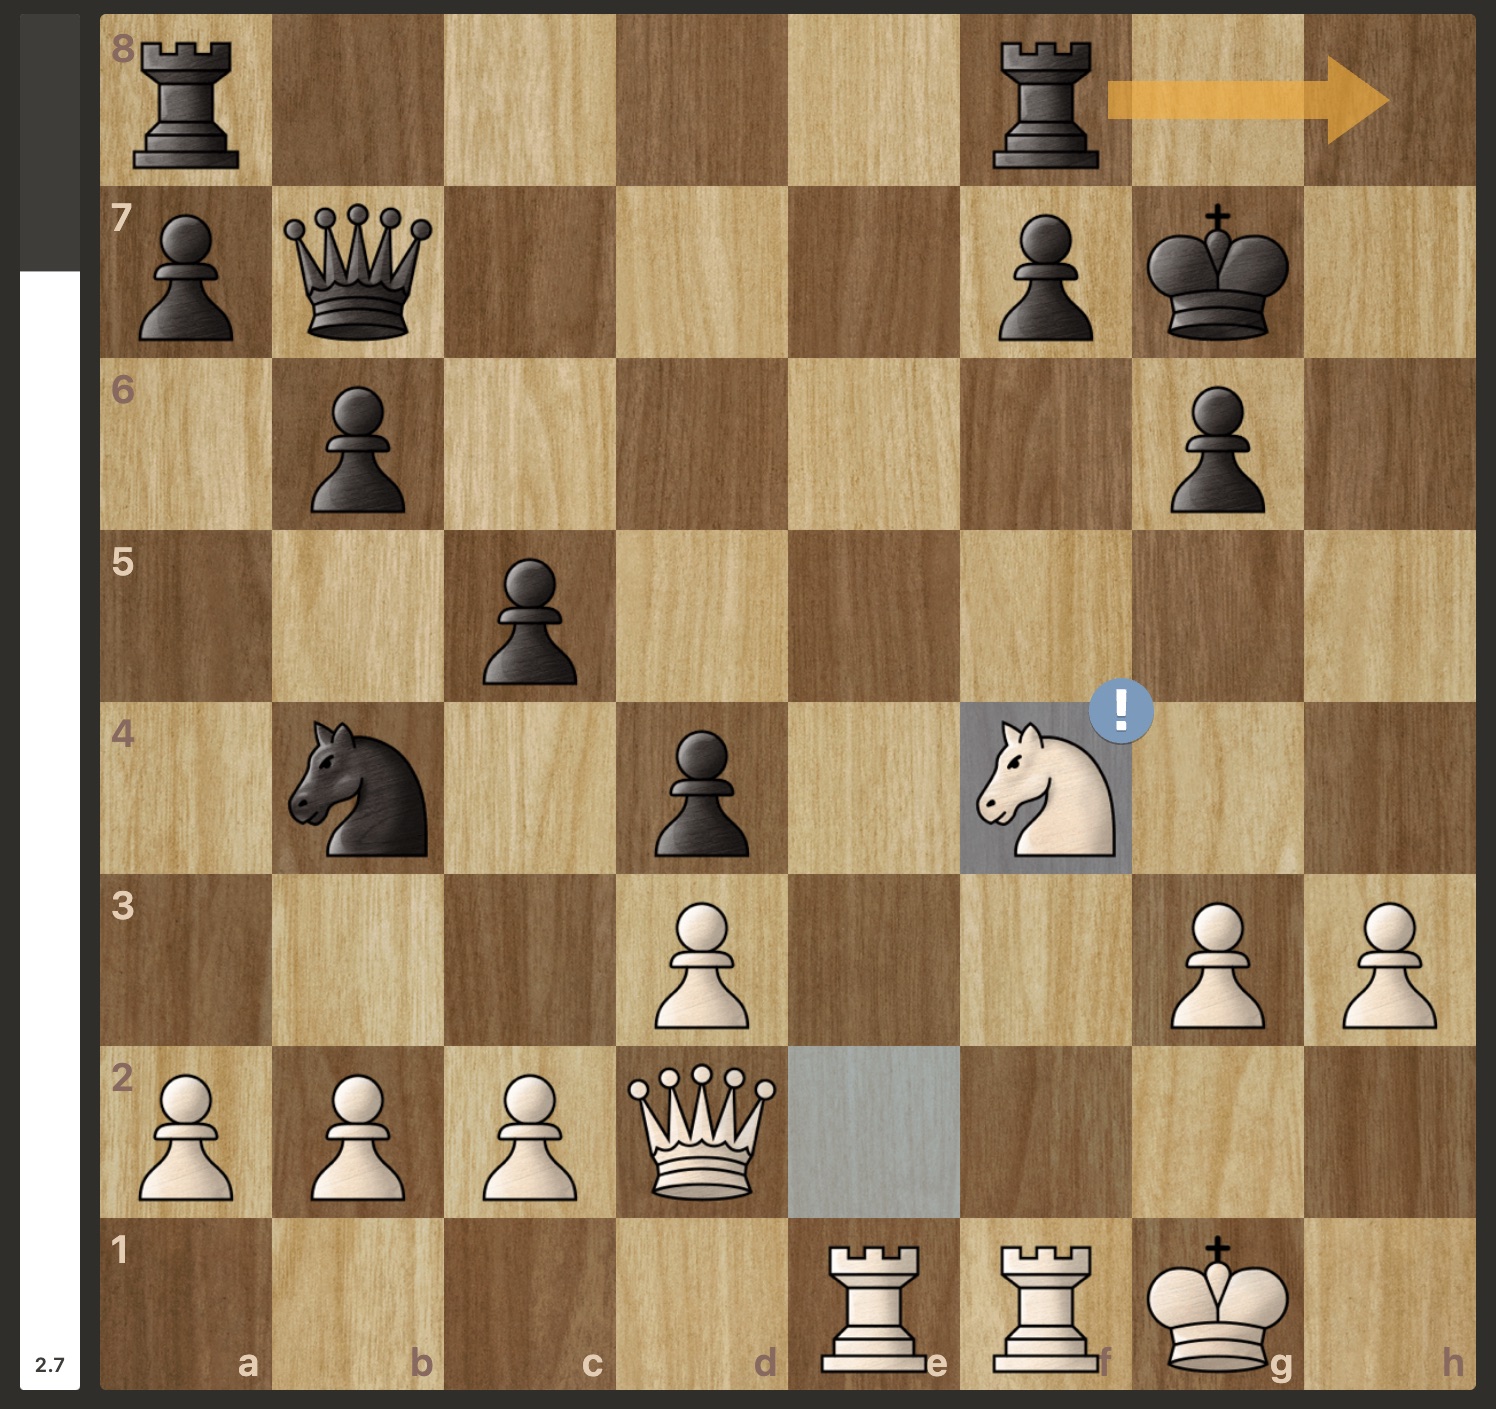
Nf4!
The only winning move. The threat is to sacrifice the knight on h5, because if taken, Qg5+ Kh7 Rf4 either leads to mate, or the queen having to give itself up for the rook, after which black is materially losing and the white attack rages on. To illustrate the threat, lets assume black answers Nf4 with some dummy move like Nxa2:
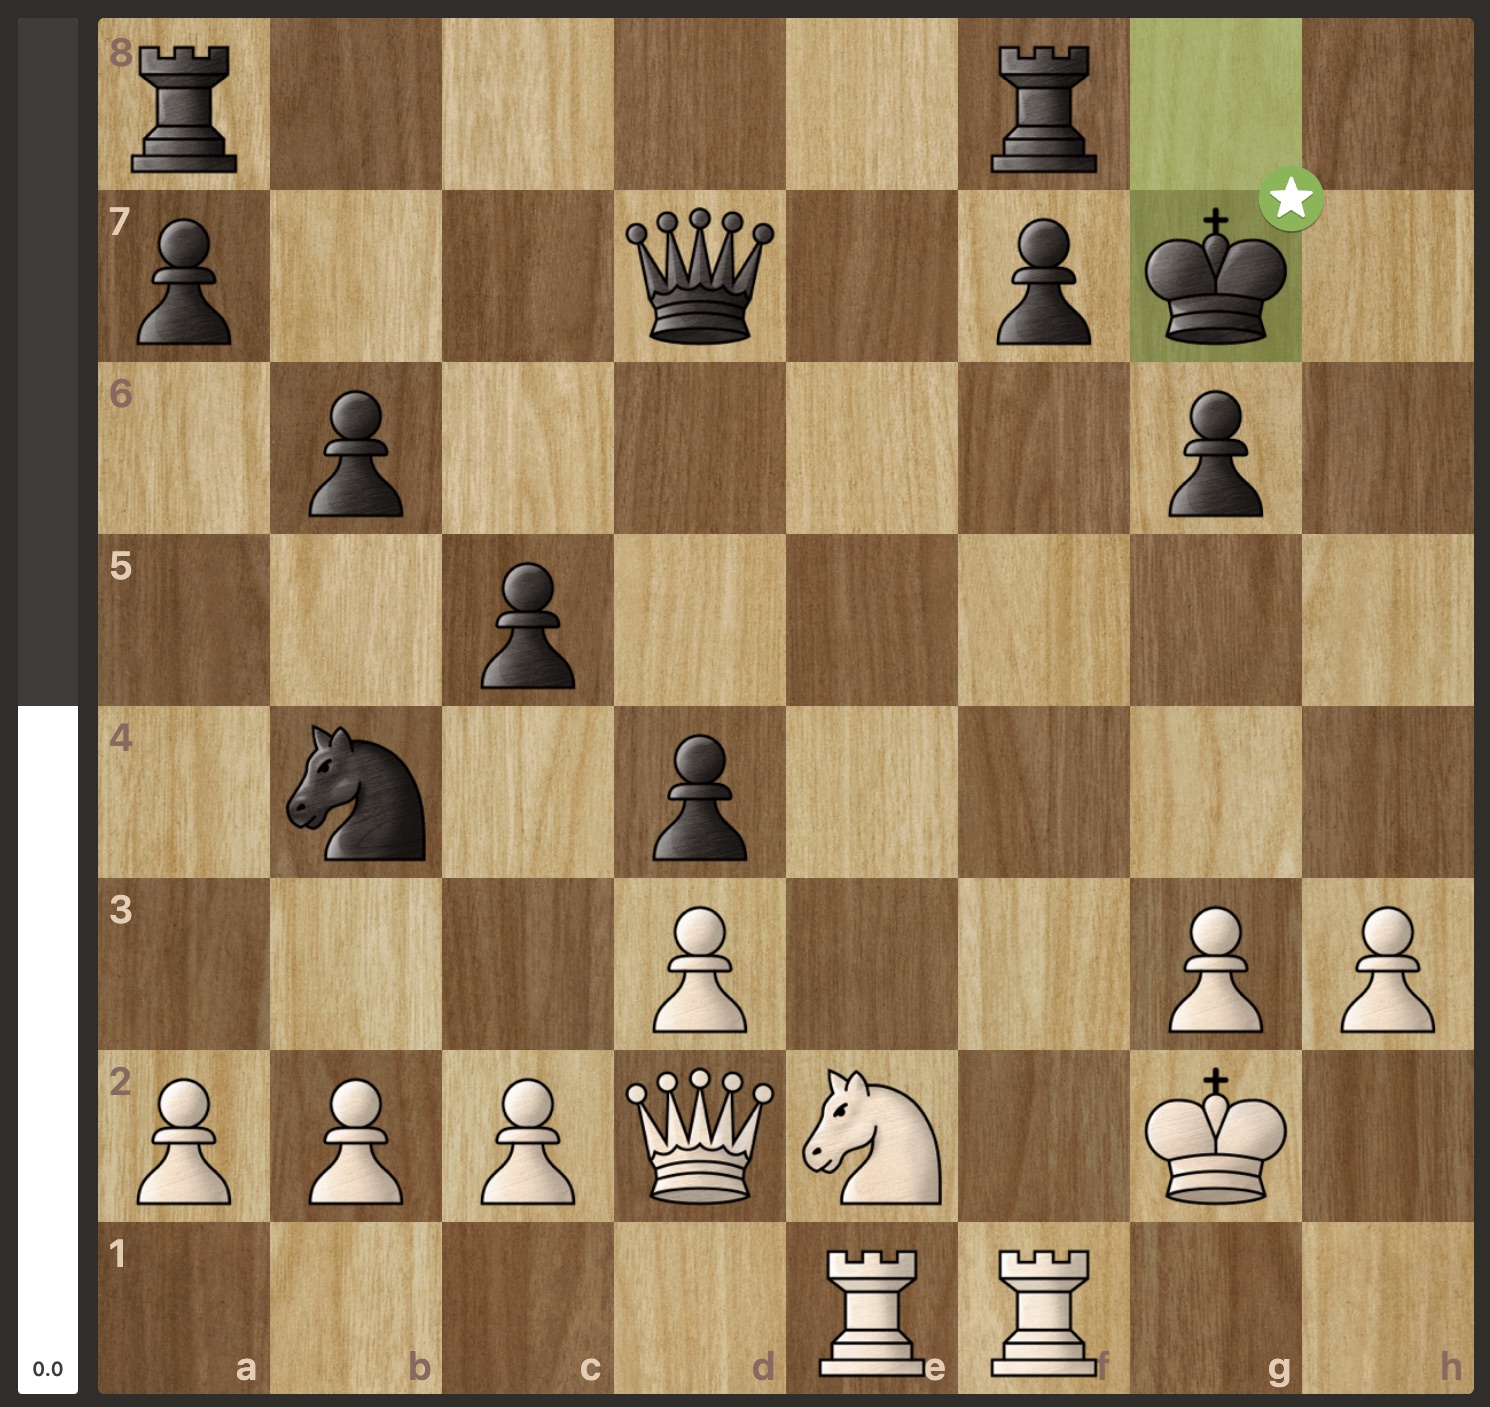
After Nf4!, black has to spot Rh8 if he wants any chance of surviving the position. Even then, white retains all of the advantages of the position and black simply has no active play. White has the time to further coordinate his pieces and just poke at the black king position until he concedes more and more weaknesses.
The absolute top engine defence results in the following miserable position for black where the top move is f5, permanently giving up on any hope of long-term king safety and doing nothing to activate any of blacks redundant pieces: